Installing Python for data analysis
If you have never used Python before, but would like to try using it for analysing data, this article may help get you started. It provides some basic instructions for installing a Python interpreter, installing some useful Python packages, and running some basic code.
The screenshots in this article assume you are installing Python on a computer with a Windows 10 operating system. However, you should be able to follow similar instructions to install on Mac or Linux.
Installing a Python interpreter
To run Python code, you need to download and install a Python interpreter. If you are new to Python, I recommend that you install something called “Miniconda”. Miniconda includes a Python interpreter, as well as some useful tools to help you install Python packages. Miniconda is provided by a company called Continuum Analytics, but it is free for anyone to download and use.
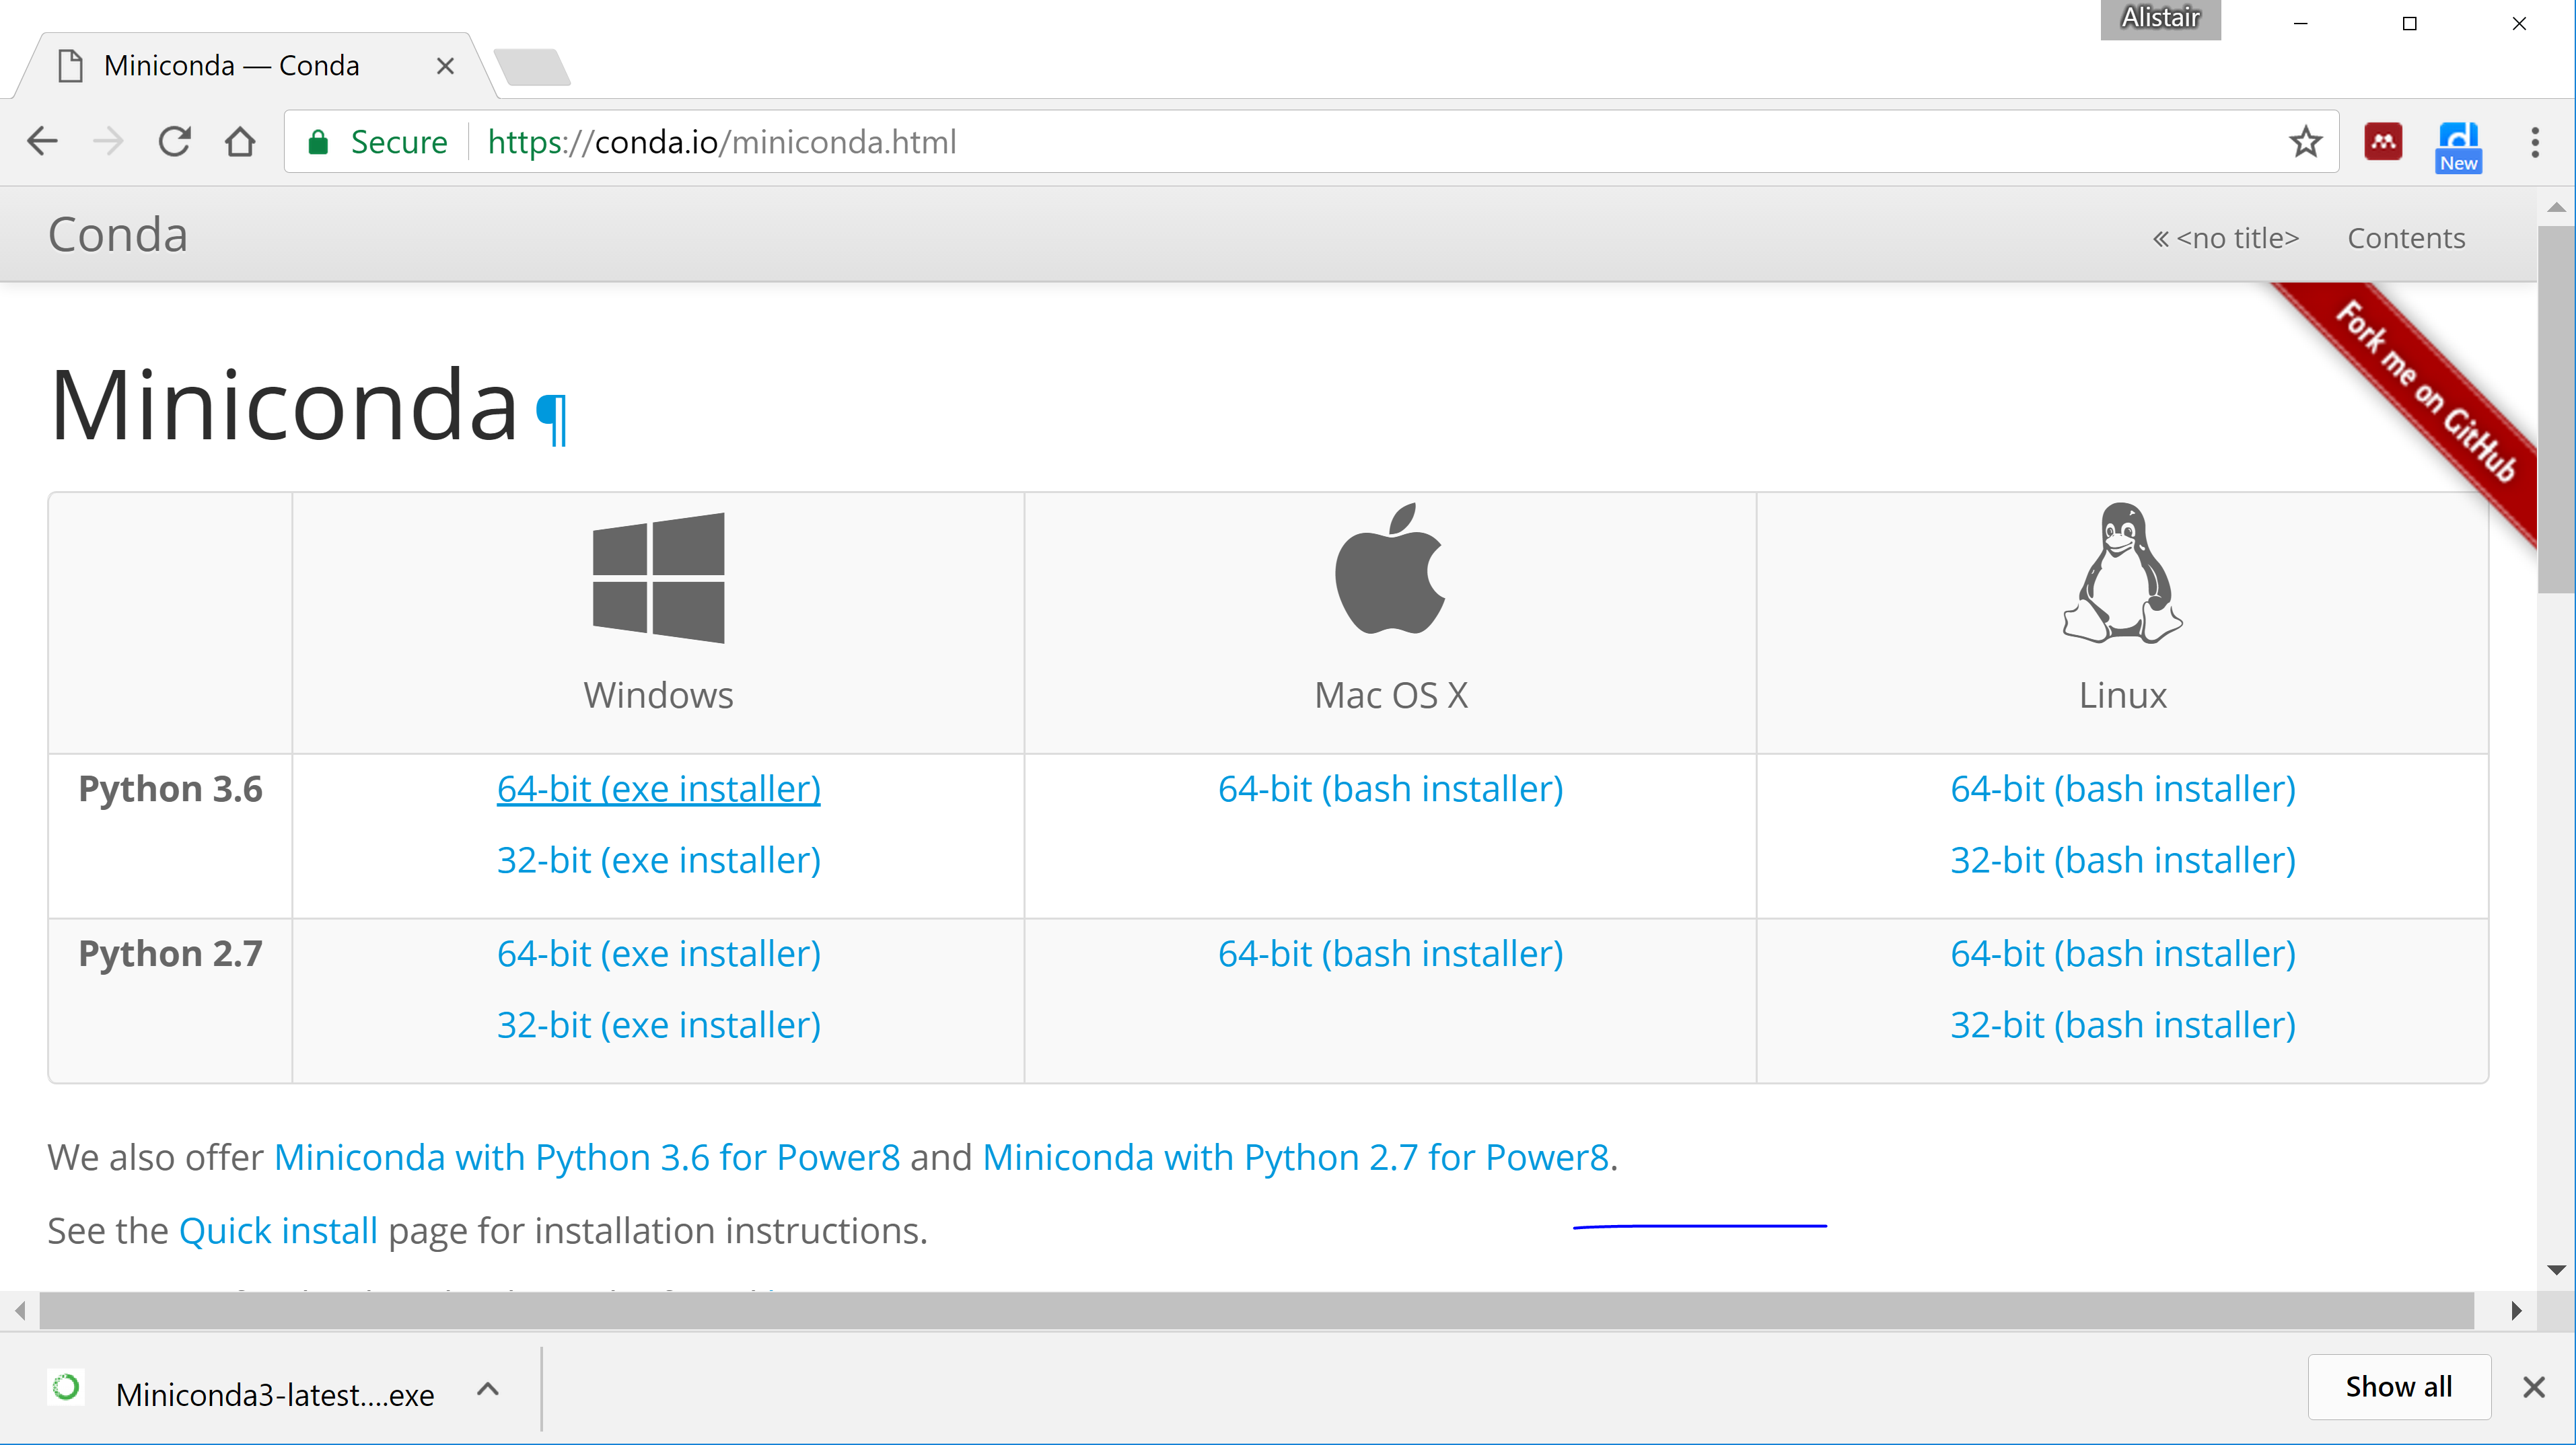
To download miniconda, go to https://conda.io/miniconda in your Web browser. You should see something like the screenshot below. If you’re computer is running Windows, click on the “64-bit (exe installer)” link in the “Python 3.6” row and the “Windows” column.
Once the installer has downloaded, run it (e.g., click on the “Miniconda3-latest…exe” button). This should launch the installer wizard, which looks something like this:
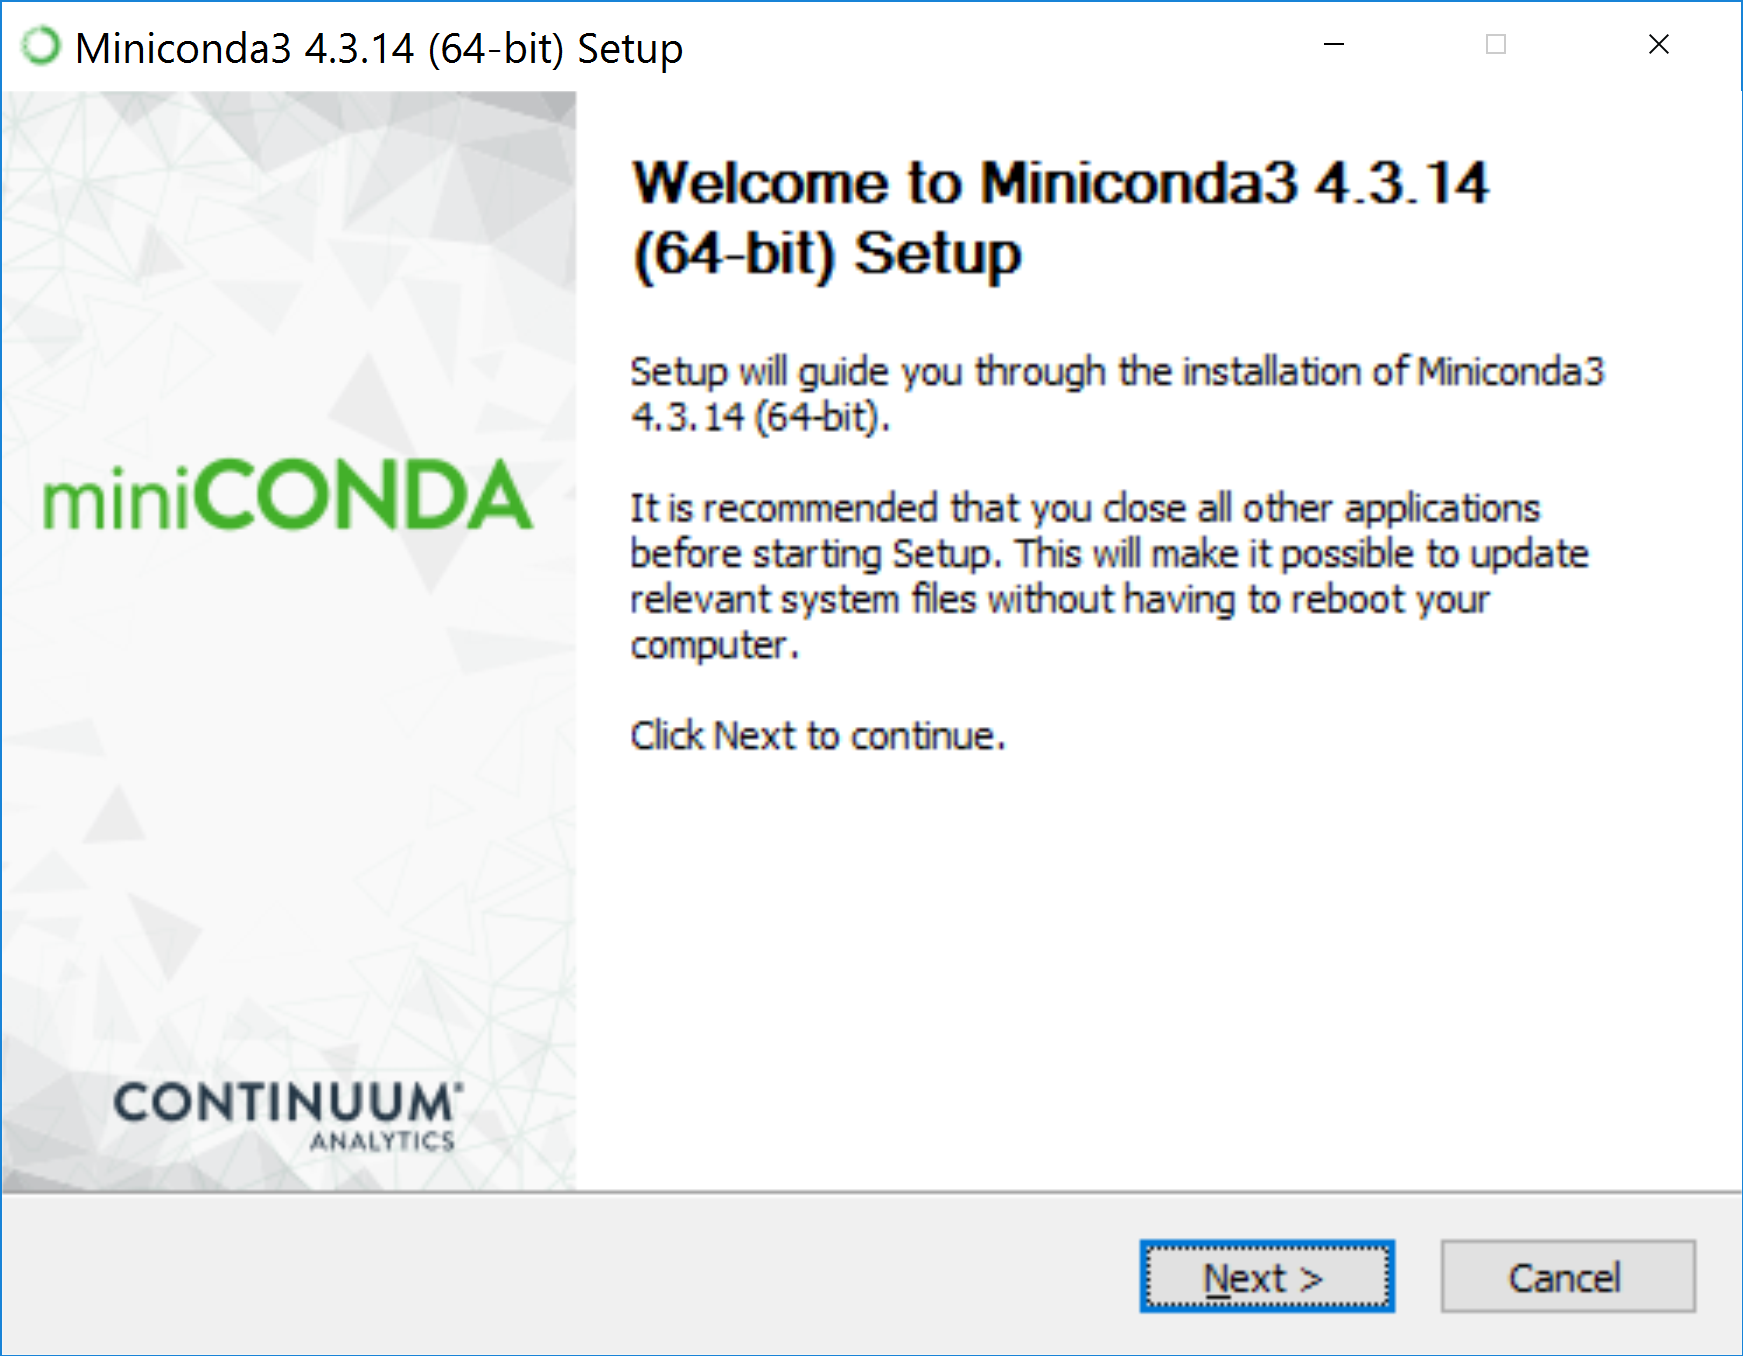
Follow the instructions to complete the installation. If you are using a different operating system, see these quick install instructions.
If the installation has worked, you should now have a new program called “Anaconda Prompt” available in the start menu.
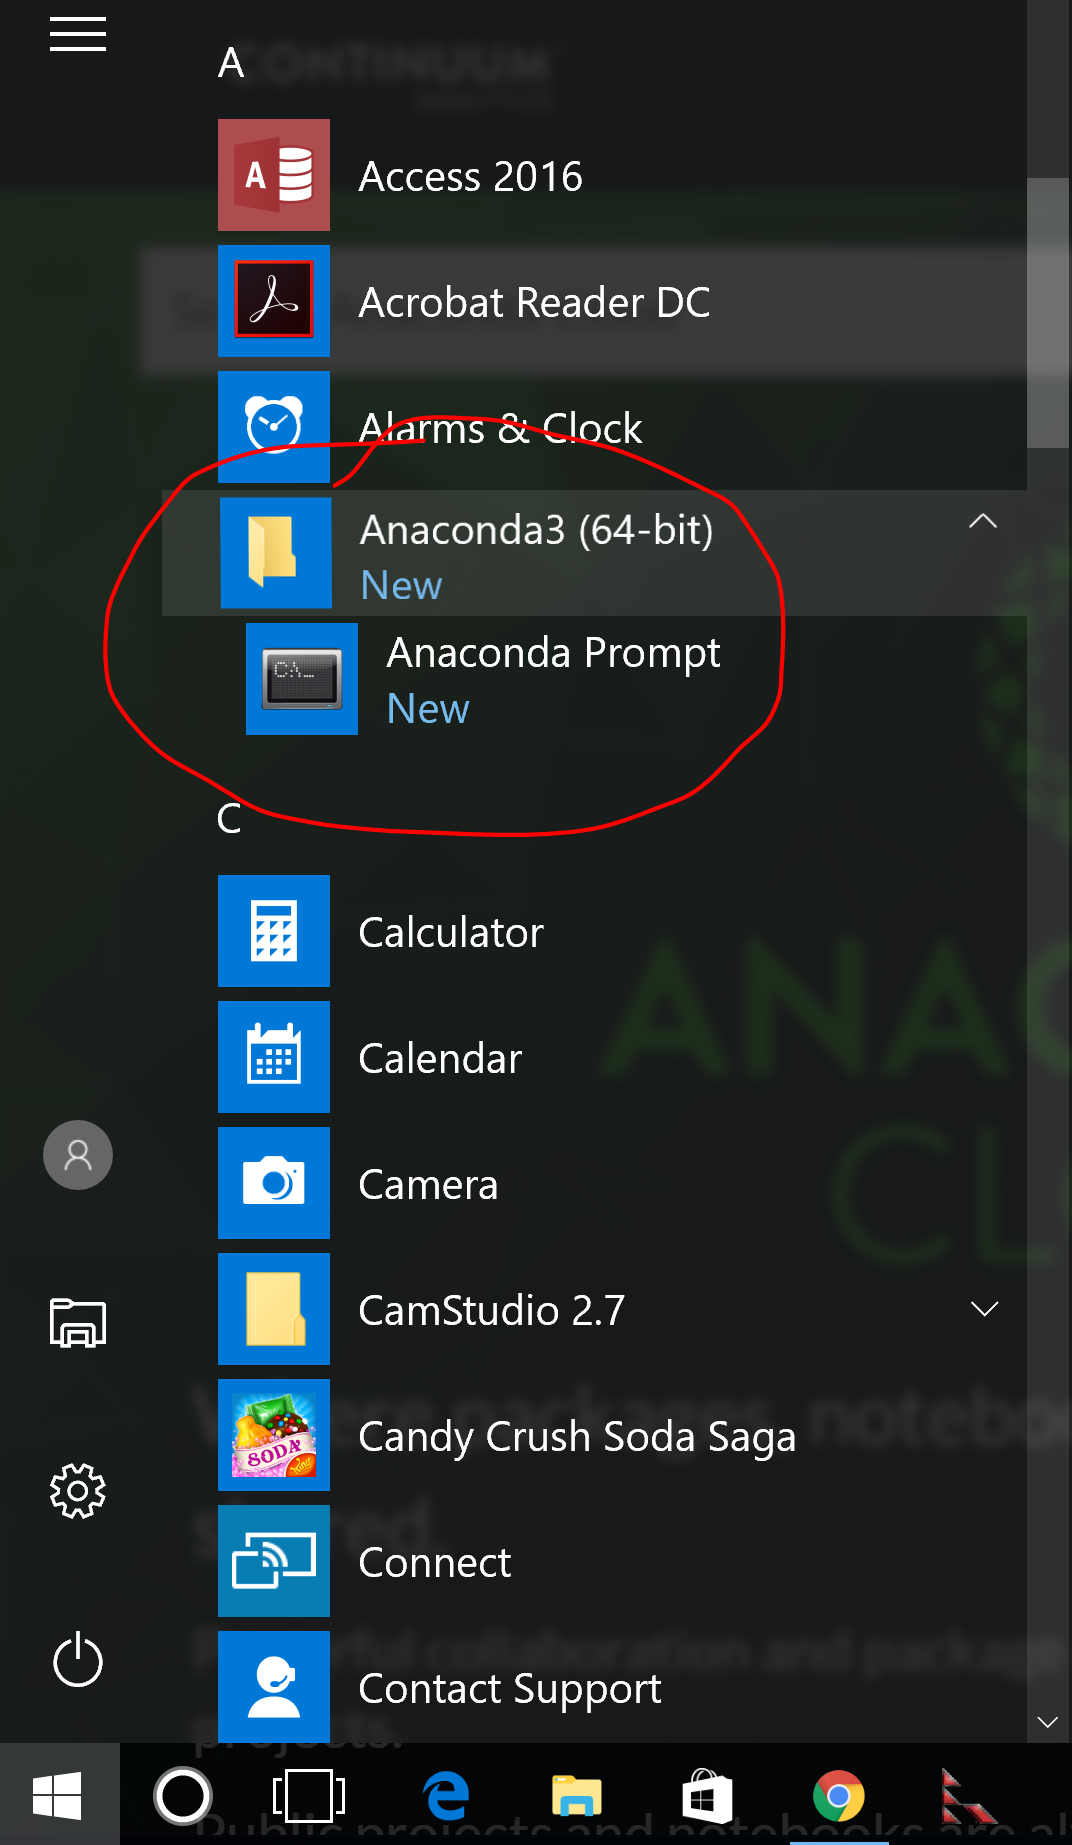
Click on the “Anaconda Prompt” icon to launch a new command prompt window. You should see something like this:

If you’ve never seen a command prompt before, don’t be scared. It is basically a way
of talking directly to your computer. To use the command prompt, type a command
and then press the return key. For example, type the command “conda --help” and
press return:
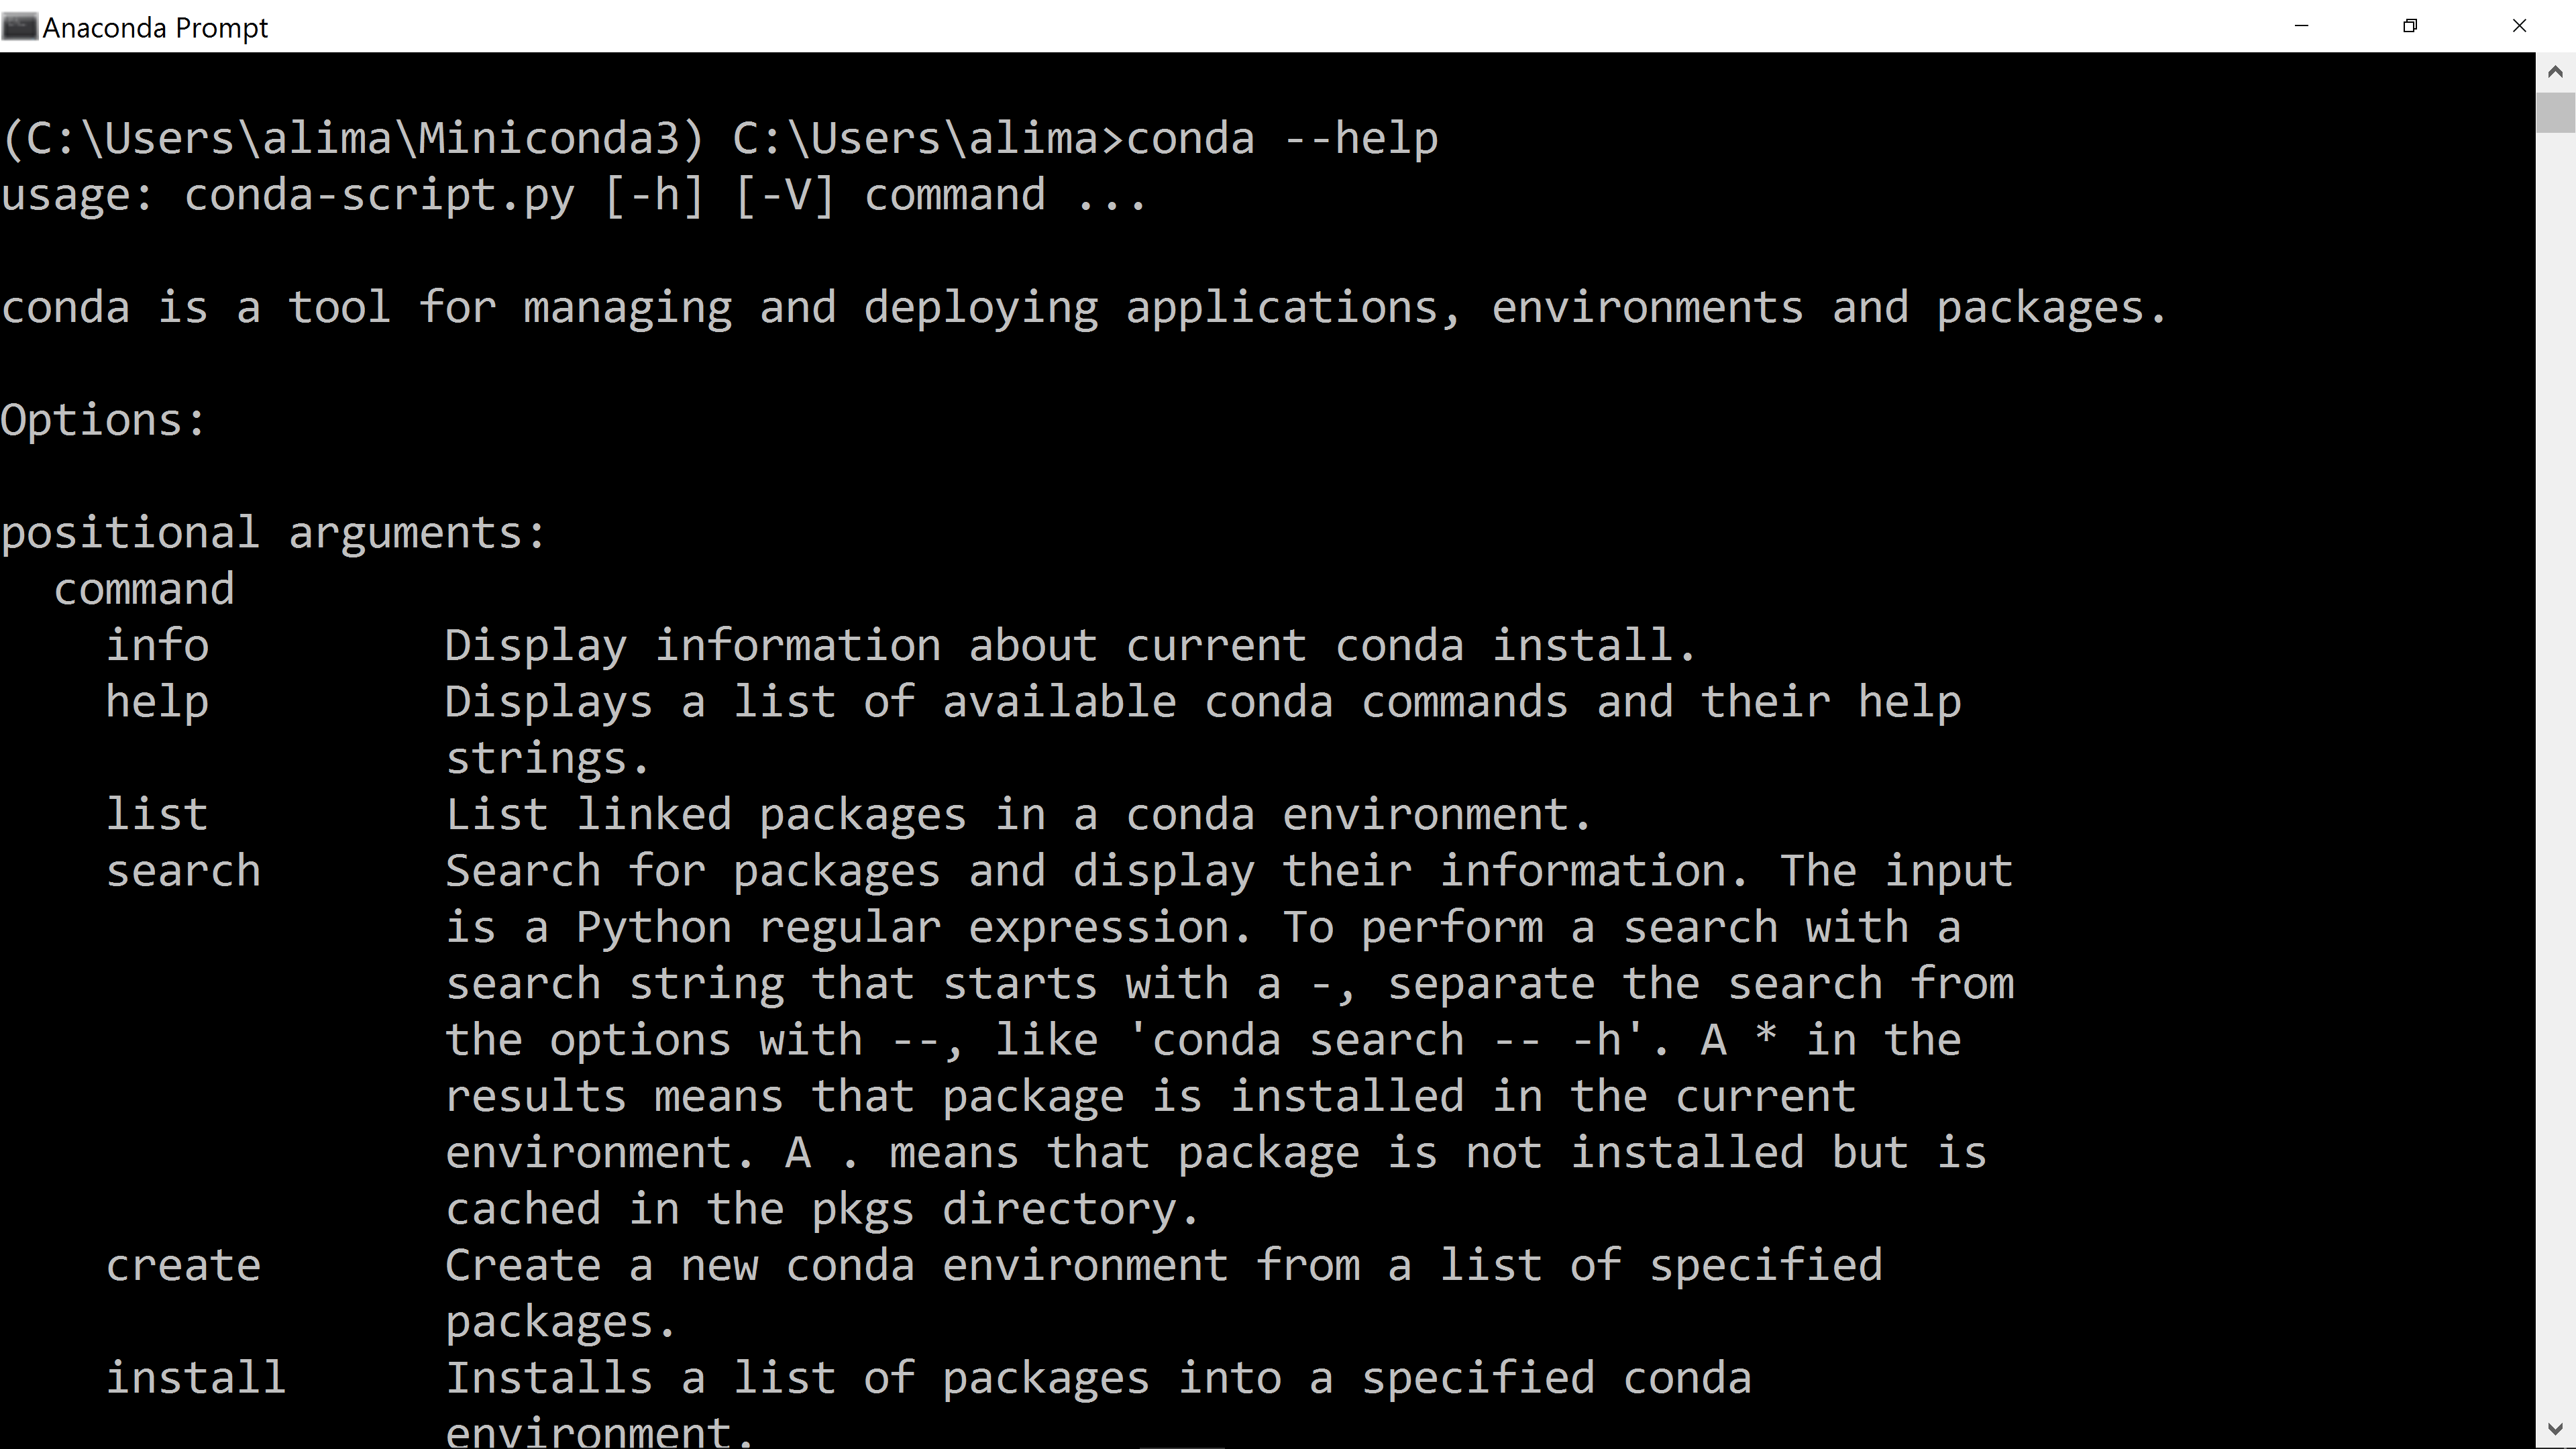
The “conda” command is very useful and provides tools for managing your Python installation, particularly creating environments and installing new Python packages, which we’ll look at in a moment.
But before going any further, I recommend running the command “conda config --add
channels conda-forge”:

When you are installing Python packages, there are several different “channels” that you can get your packages from. The “conda-forge” channel is probably the most comprehensive at this time, and so it’s good to add to the list of channels.
To see which software channels you have configured, run the command “conda config
--get channels”:

If you are installing on Linux and you are planning to analyse biological data, you can also add the “bioconda” channel, which provides lots of bioinformatics-related software.
Creating an environment
Before you can start using Python, you need to create something called an “environment”. An environment is just a place for you to install packages into and do work in.
To create an environment, type the command “conda create --name pyenv1
python=3.5”, press return, then press return again when it asks you if you want to
proceed:
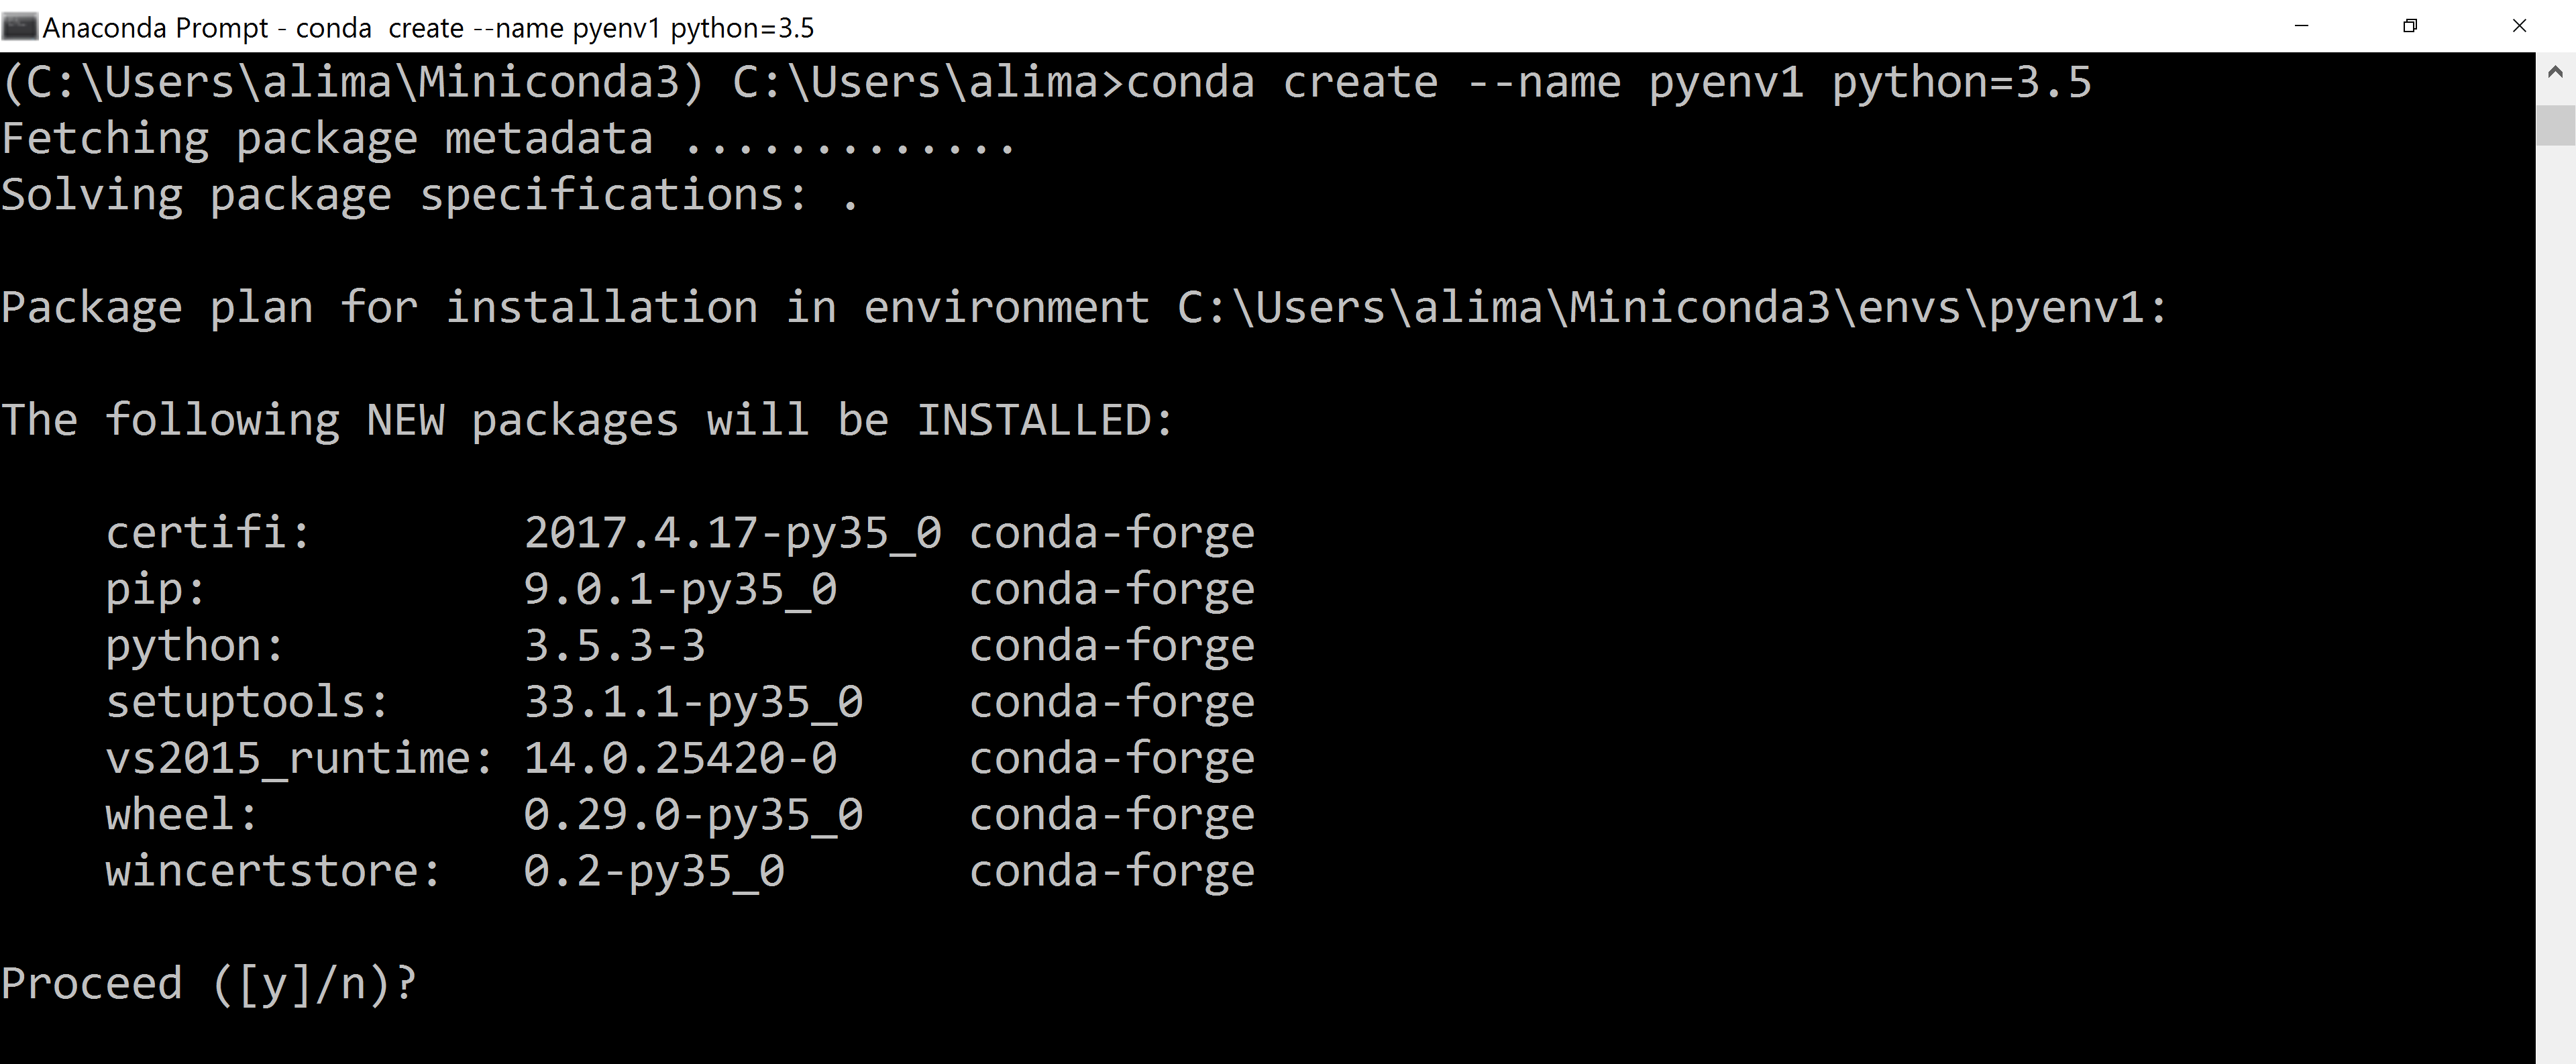
This command creates a new environment called “pyenv1” and installs Python version 3.5 into that environment. You can call the environment whatever you like. You can also use a different version of Python if you like. The most recent Python version at the time of writing is 3.6, however a few packages are not yet available for 3.6 so I’m going to stick with 3.5 for this tutorial.
If the environment was successfully created, you should see a message like this:
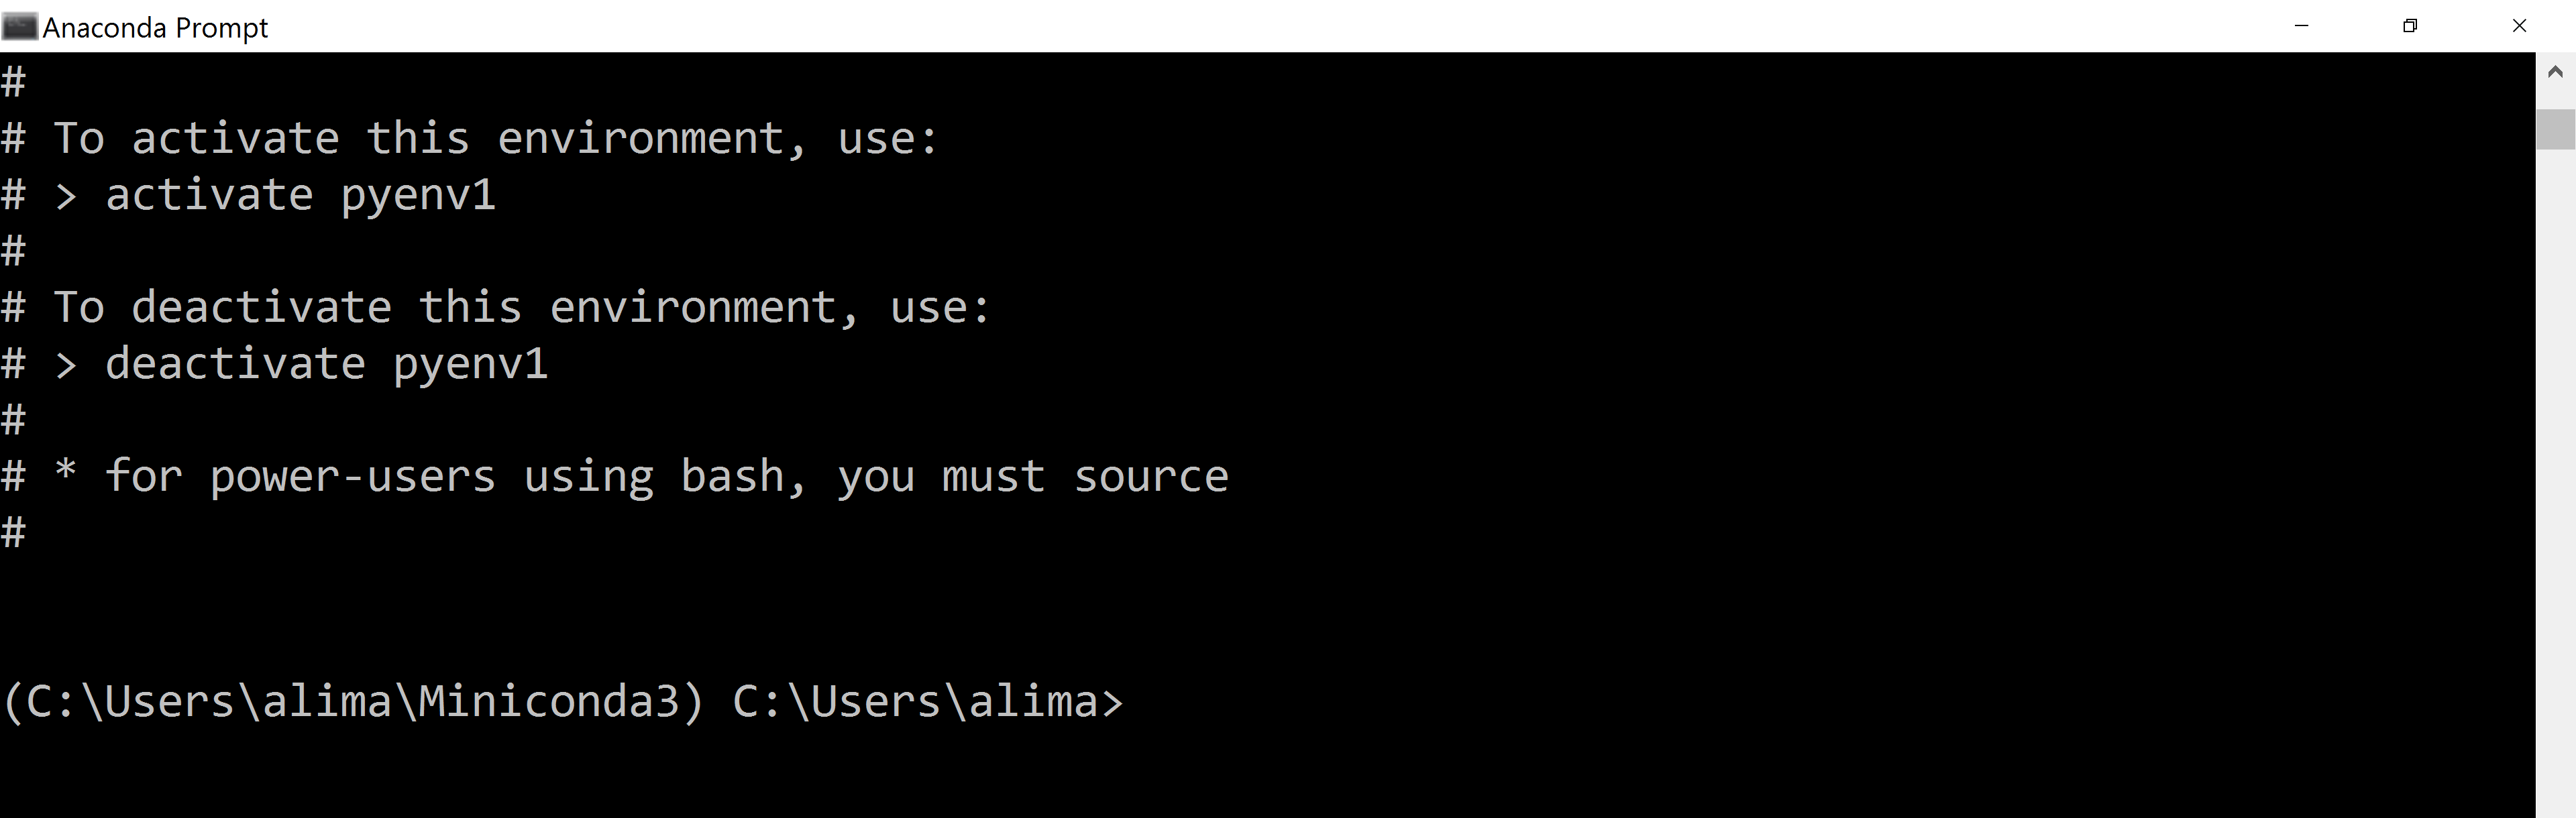
To use the environment, type the command “activate pyenv1”:

If you are on Mac or Linux, you will need to type “source activate pyenv1”
instead.
Now the environment is active and you can start using Python.
Creating an environment is something you only have to do once. Any time in future you
want to use Python, you can just launch the Anaconda Prompt then type “activate
pyenv1” to activate the environment again.
Using the Python interpreter
To launch the Python interpreter in interactive mode, type the command “python” at the
prompt:

The three arrows (“>>>”) mean that you are now in an interactive Python session.
Here you can type commands using the Python programming language.
For example, type the command “print('hello')” then press return. You should see
the text “hello” appear below the command:

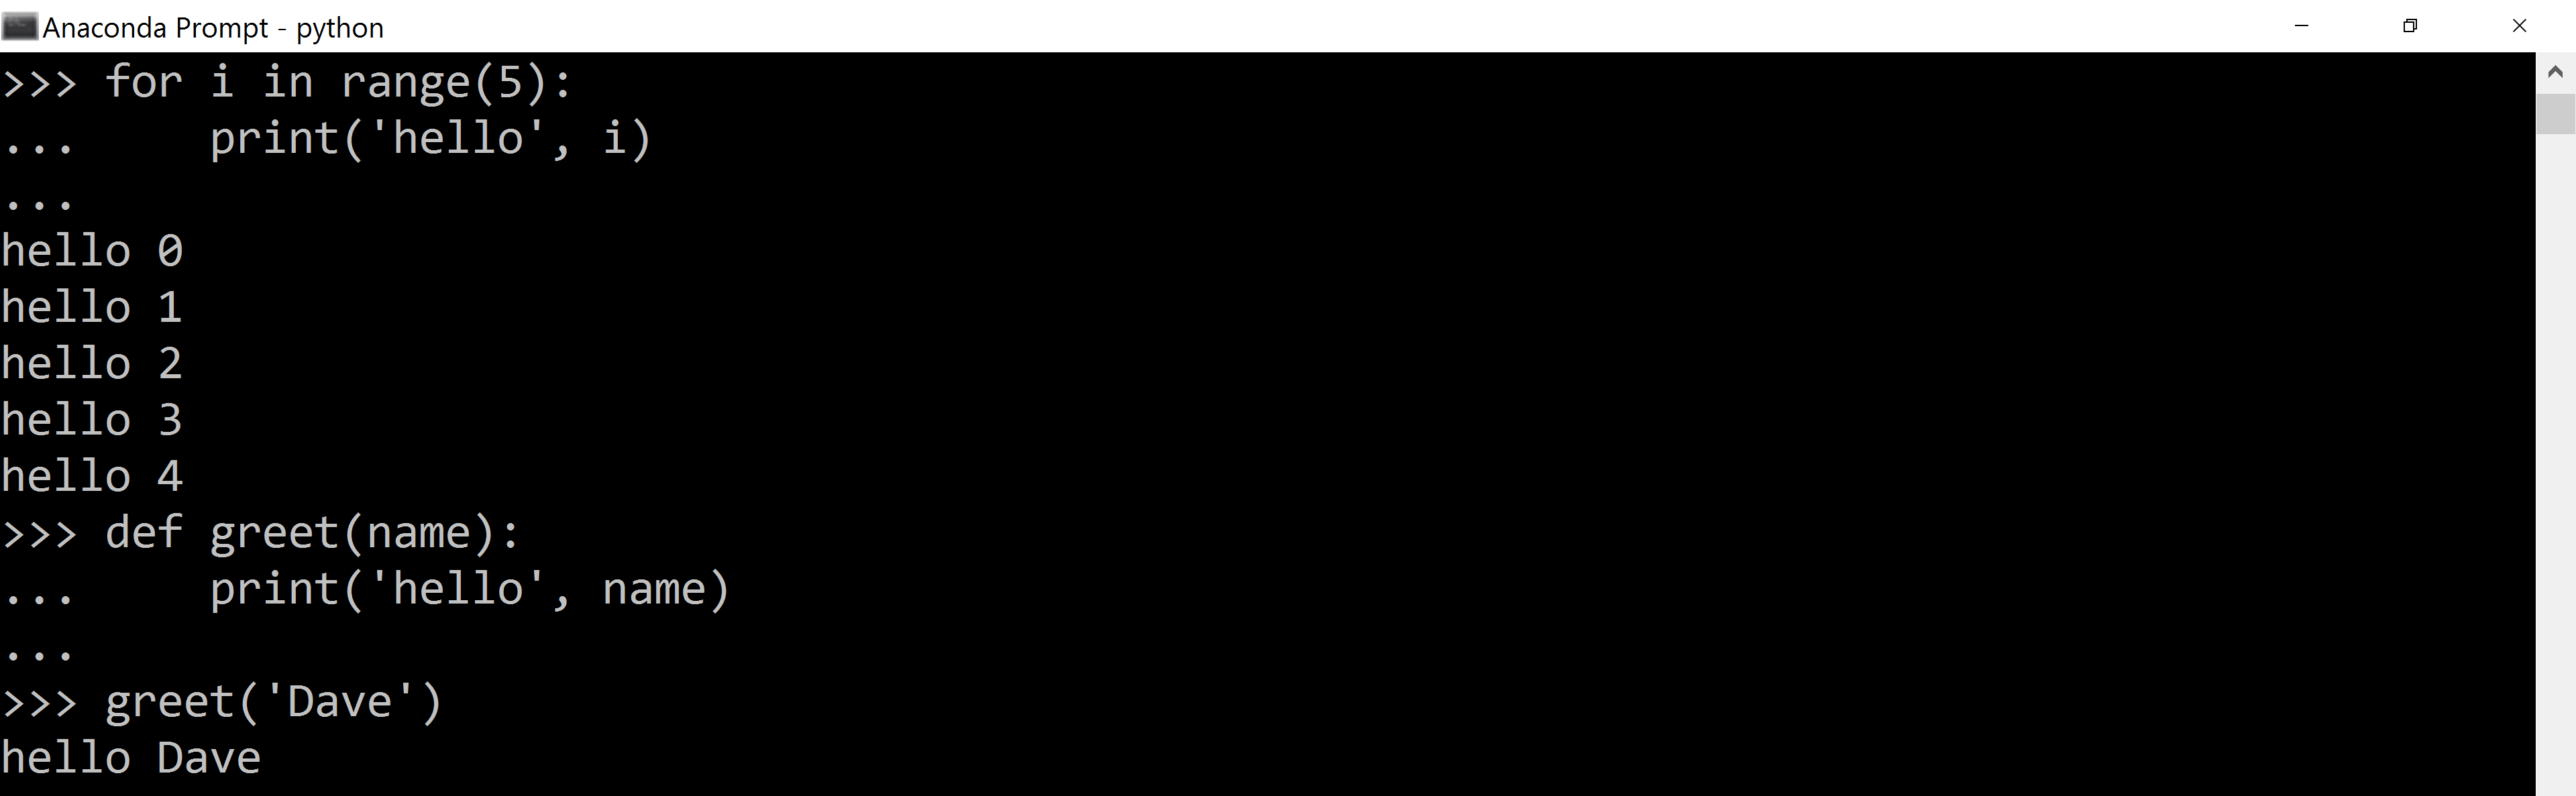
Here are some other commands to try:
To end the session, type “exit()”:

Installing packages
Python comes with lots of useful packages included, in something called the “standard library”. However, there are many many more packages available that have been written by other people and provided free of charge for others to use. In particular, there are some excellent open source packages for analysing data that you can install.
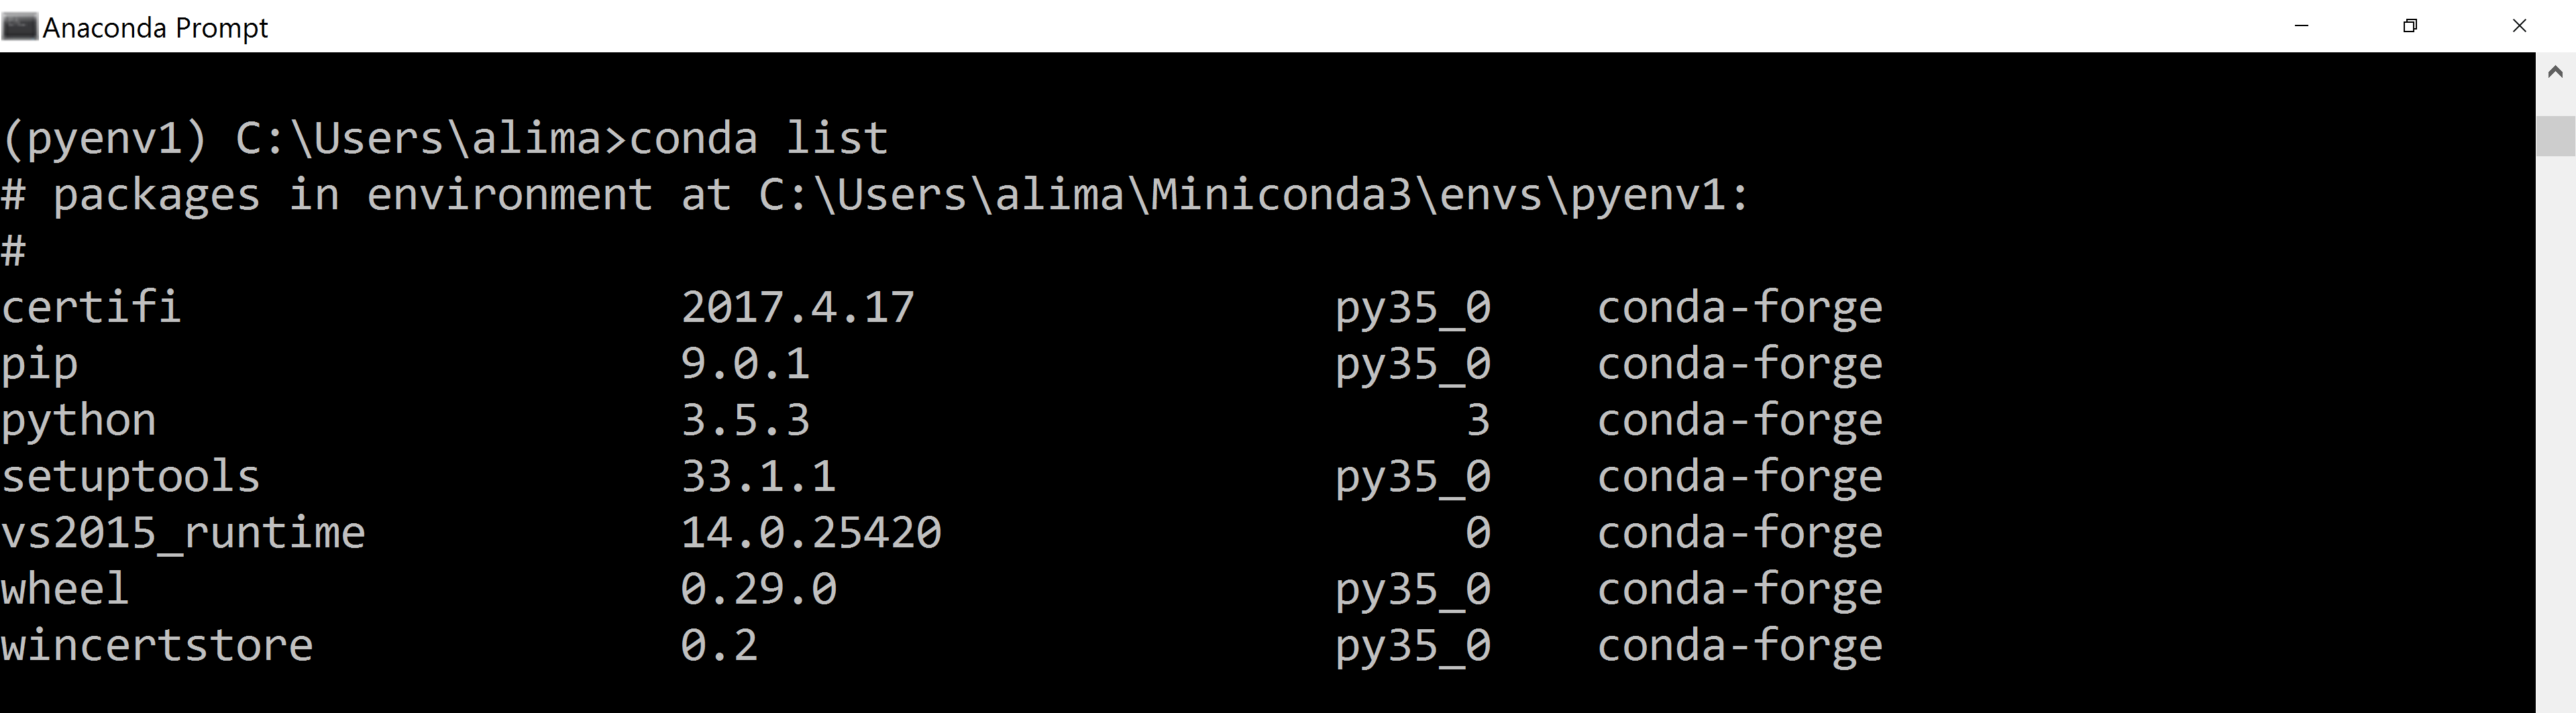
At any time, you can see the list of packages installed in your current environment by
typing the command “conda list”:
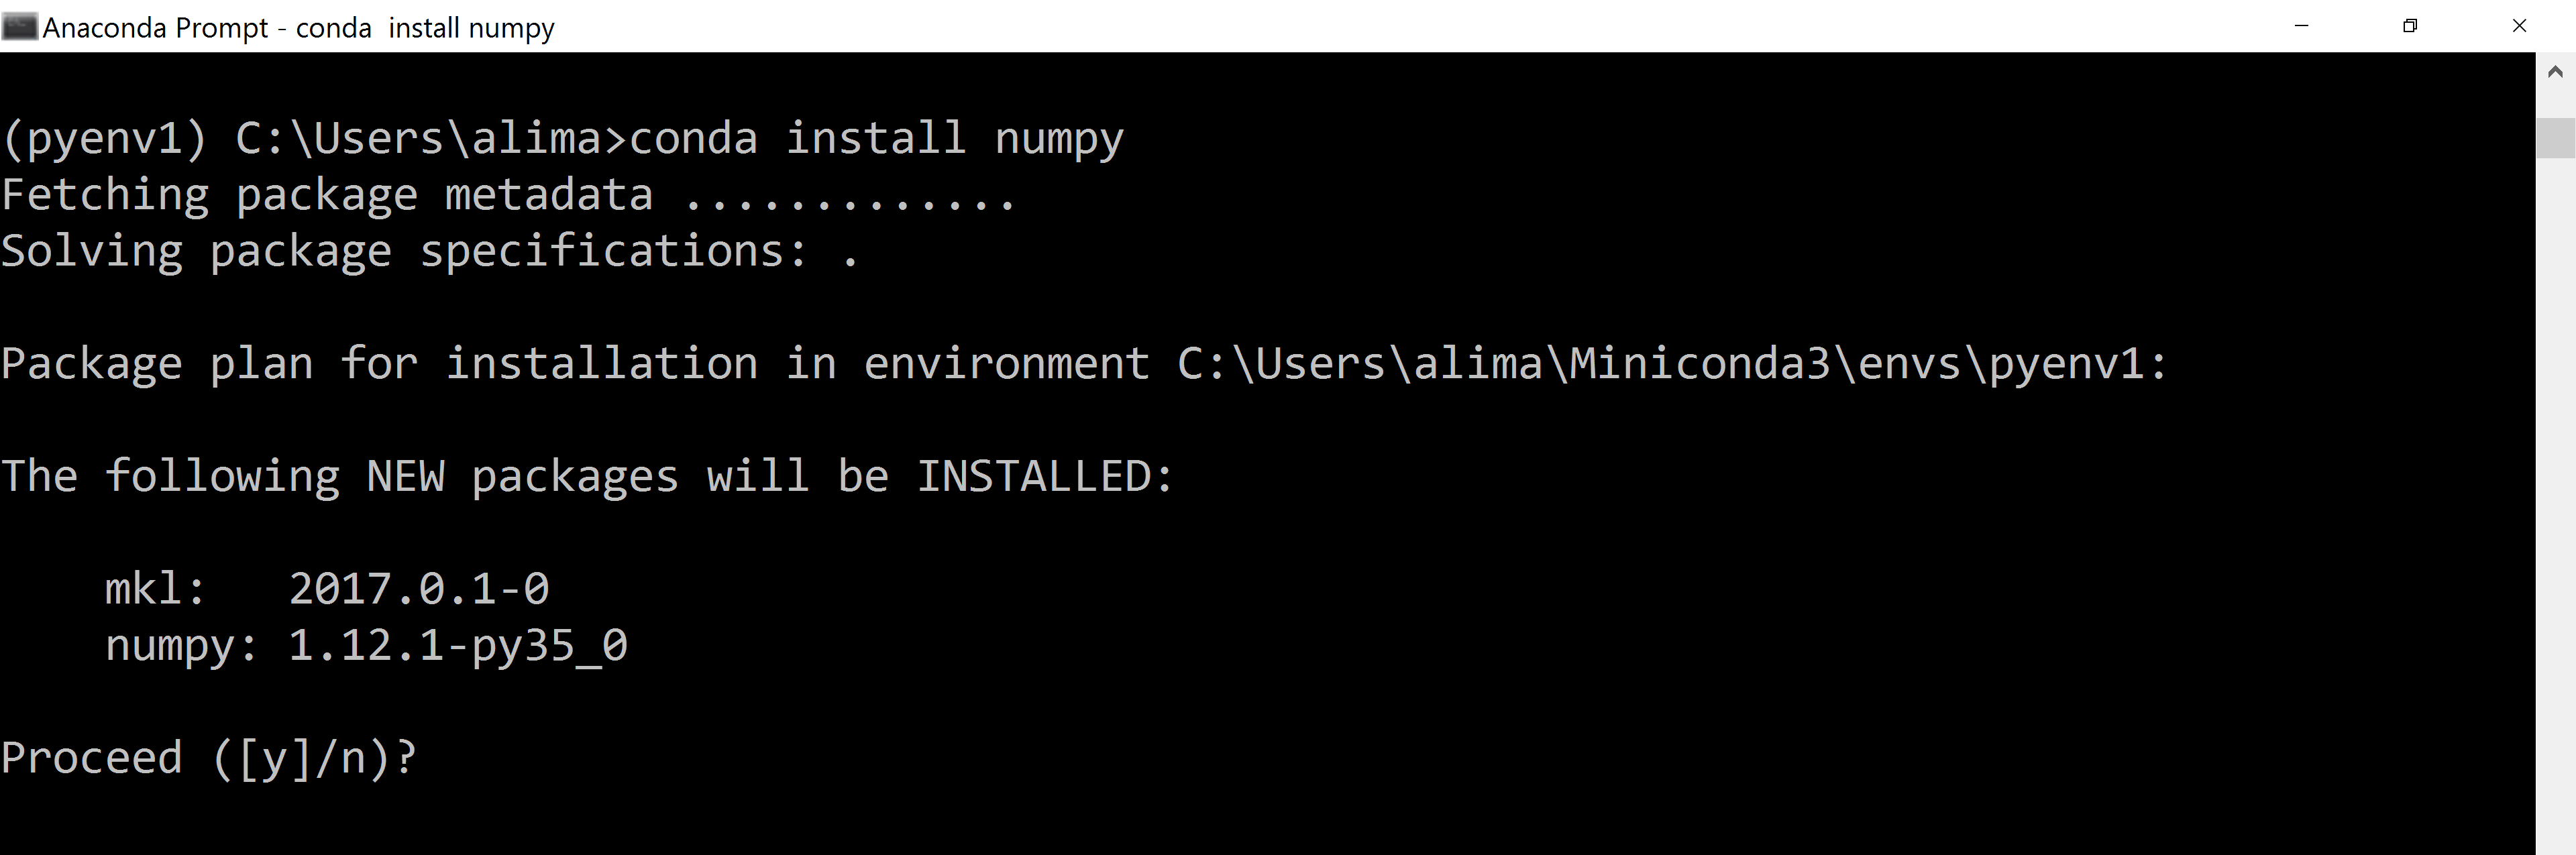
To install a new package, use the command “conda install” followed by the name of
the package. For example, let’s install a package called “numpy”:
Let’s try out this new package in an interactive Python session. Type the “python”
command to launch the Python interpreter, then type the commands below starting from
“import numpy as np”:

In the example above I assigned a new array to a variable named “a”. I then just
typed “a” at the prompt and pressed return. Returning a variable at the prompt
will cause a representation of the variable to be printed, which in this case is
“array([0, 1, 2, 3, 4])”). This is a useful way to inspect any variable in an
interactive session and something you’ll do often.
Here’s a couple more examples of programming with numpy arrays:

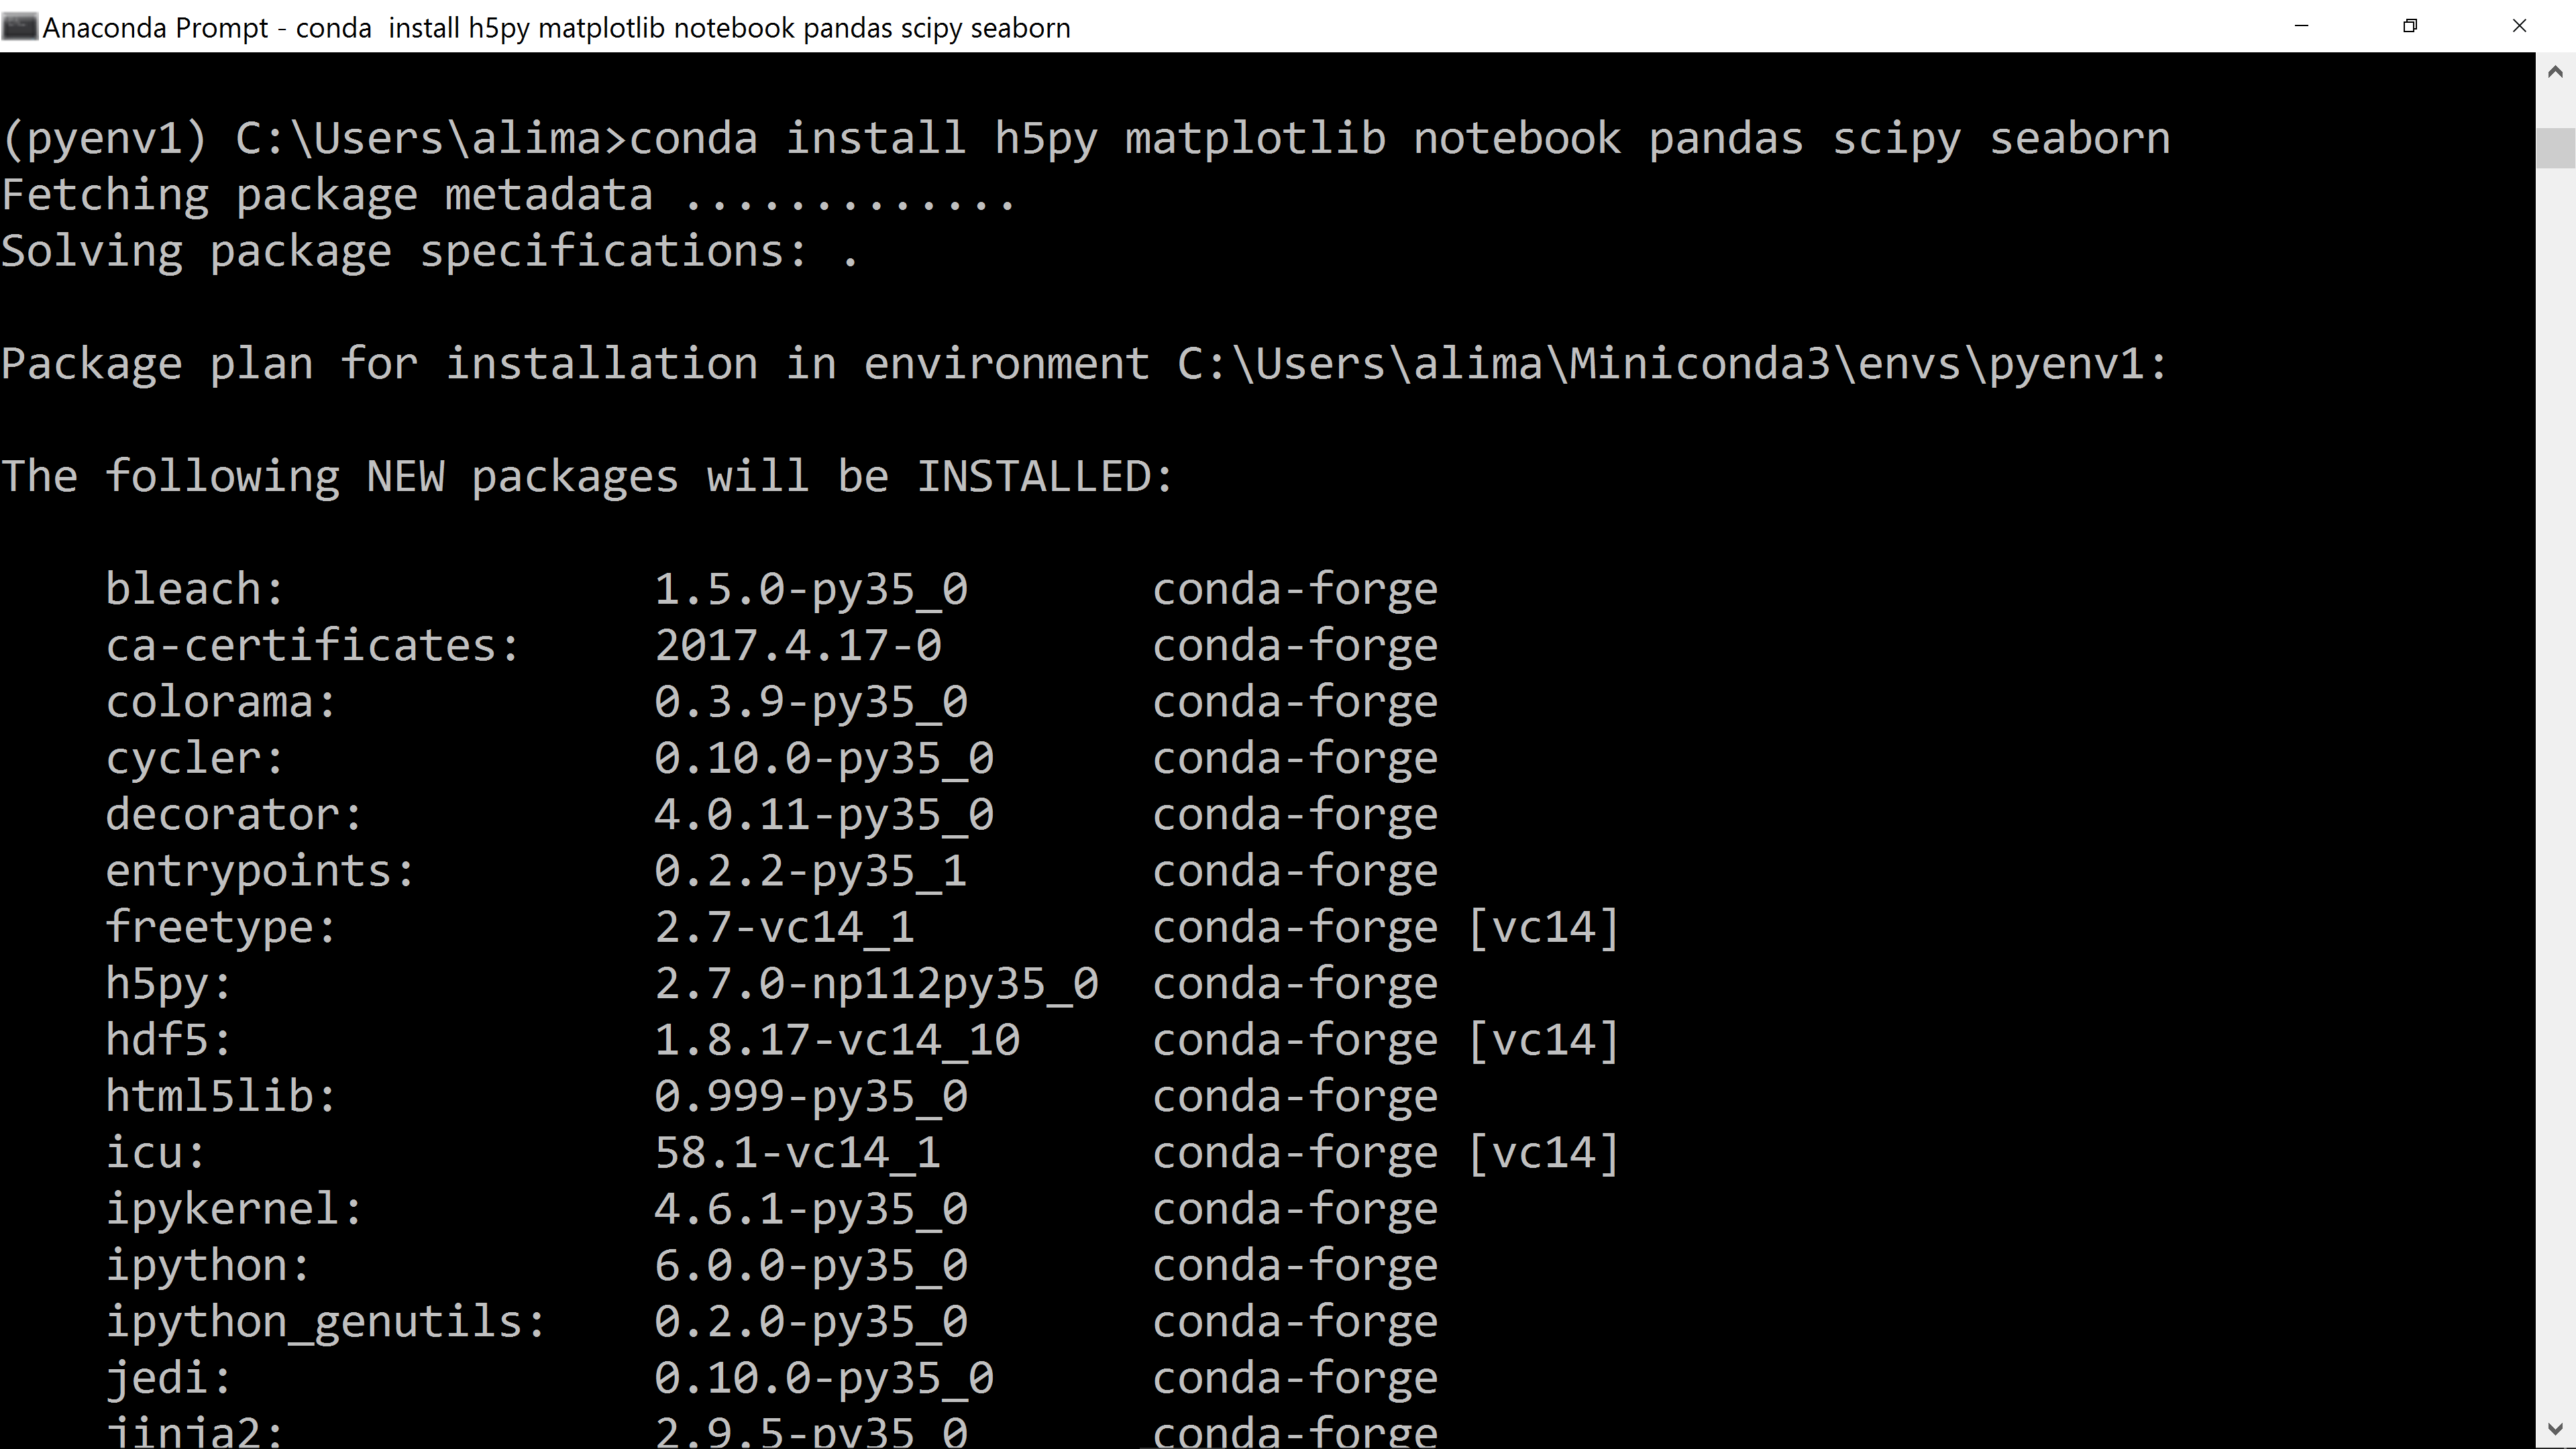
Now we’ve seen how to install the numpy package, let’s install a few more useful
packages for data analysis. Type “exit()” to close the Python session, then type
“install h5py matplotlib notebook pandas scipy seaborn” at the command prompt:
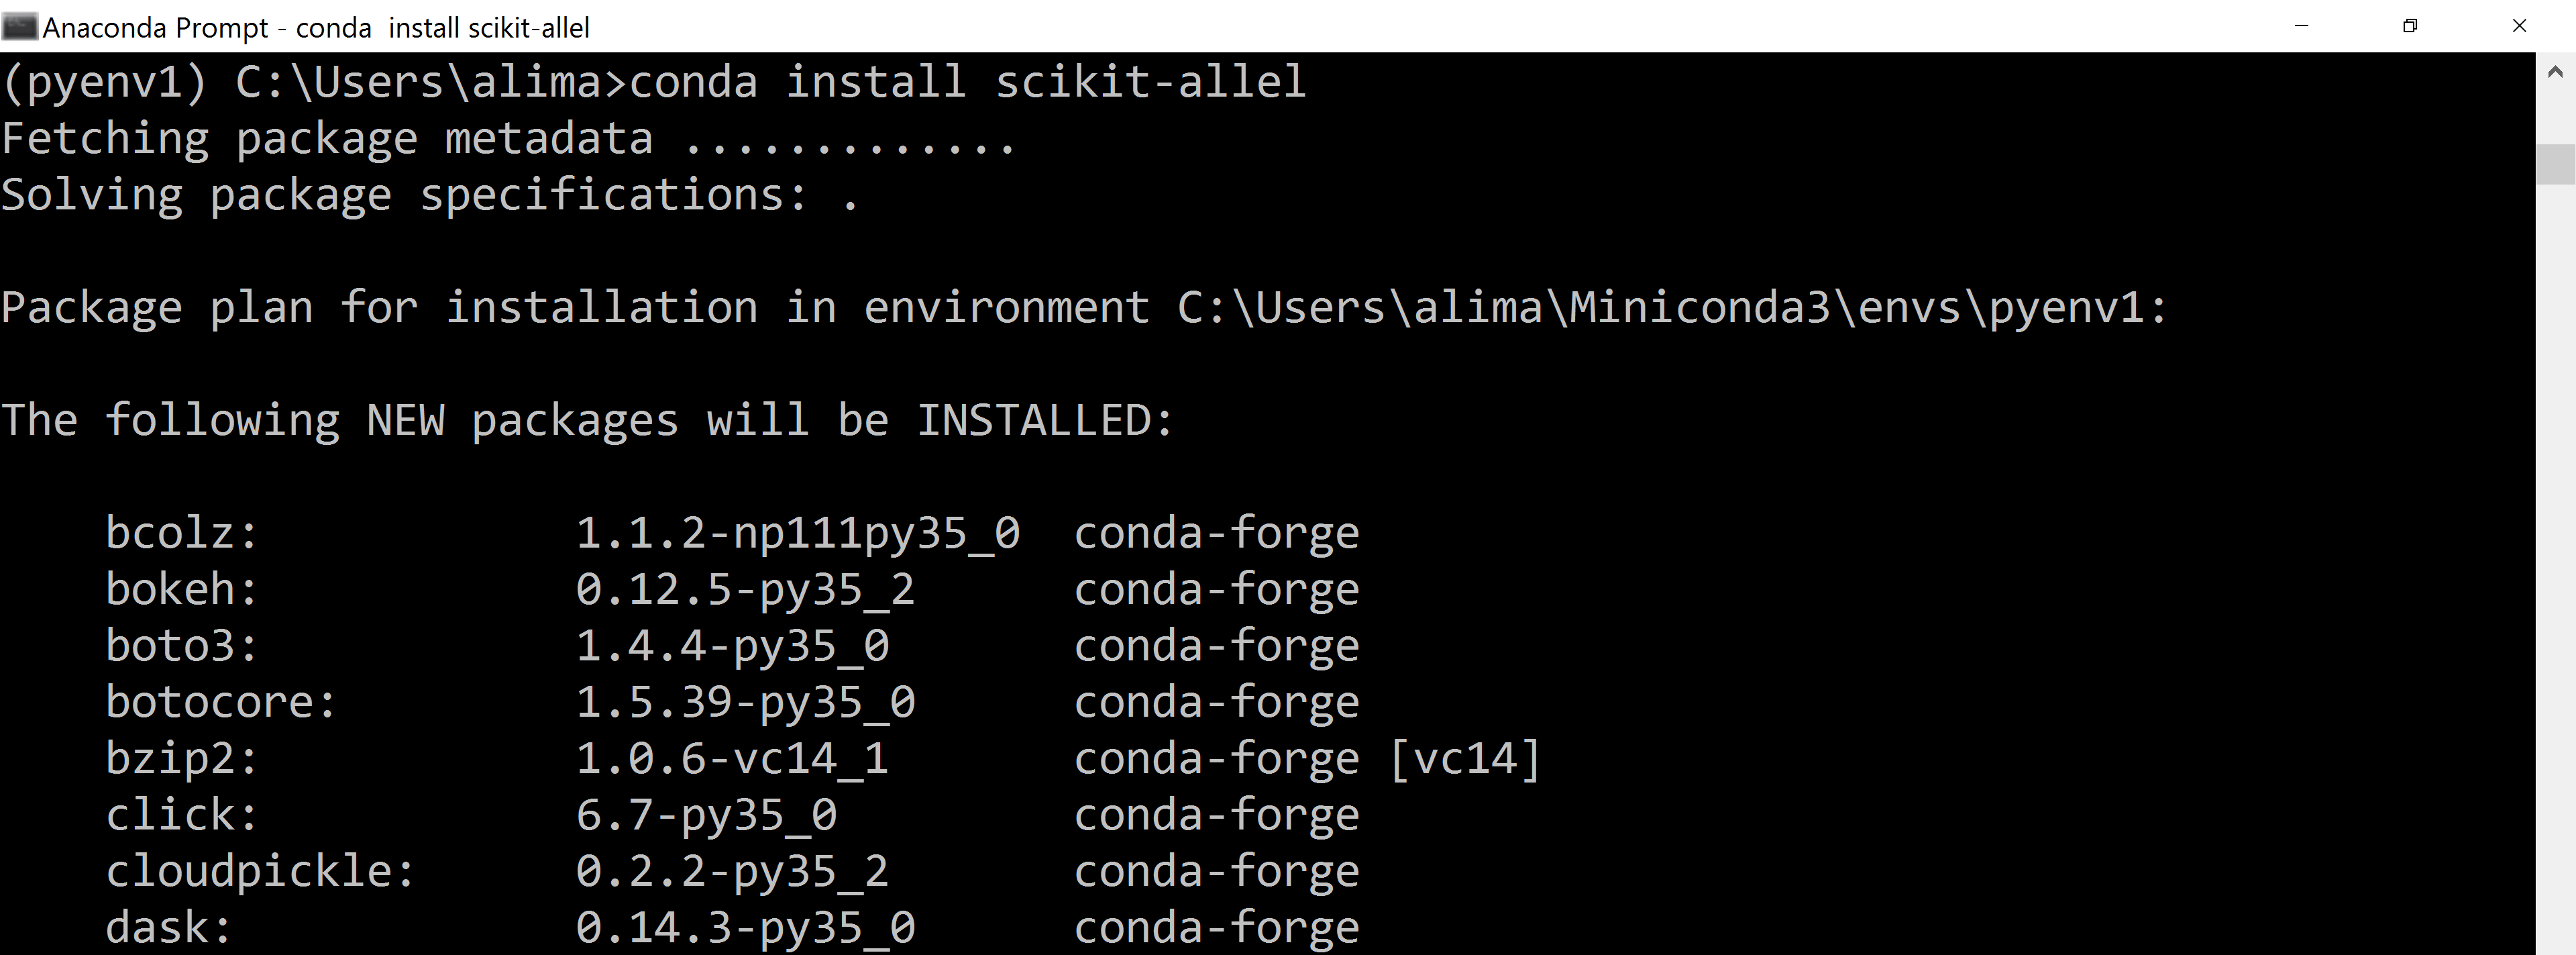
If you have found your way here via some of my other blog posts and would like to use Python to analyse genetic variation data, you can also install the “scikit-allel” package:
You’re ready now to do some real work.
Using Jupyter notebooks
If you’re planning on doing interactive data analysis then I highly recommend using Jupyter notebooks. A Jupyter notebook is a bit like a Python interactive session. You can issue commands in the same way, using the Python programming language, but you can also make plots and do lots more besides.
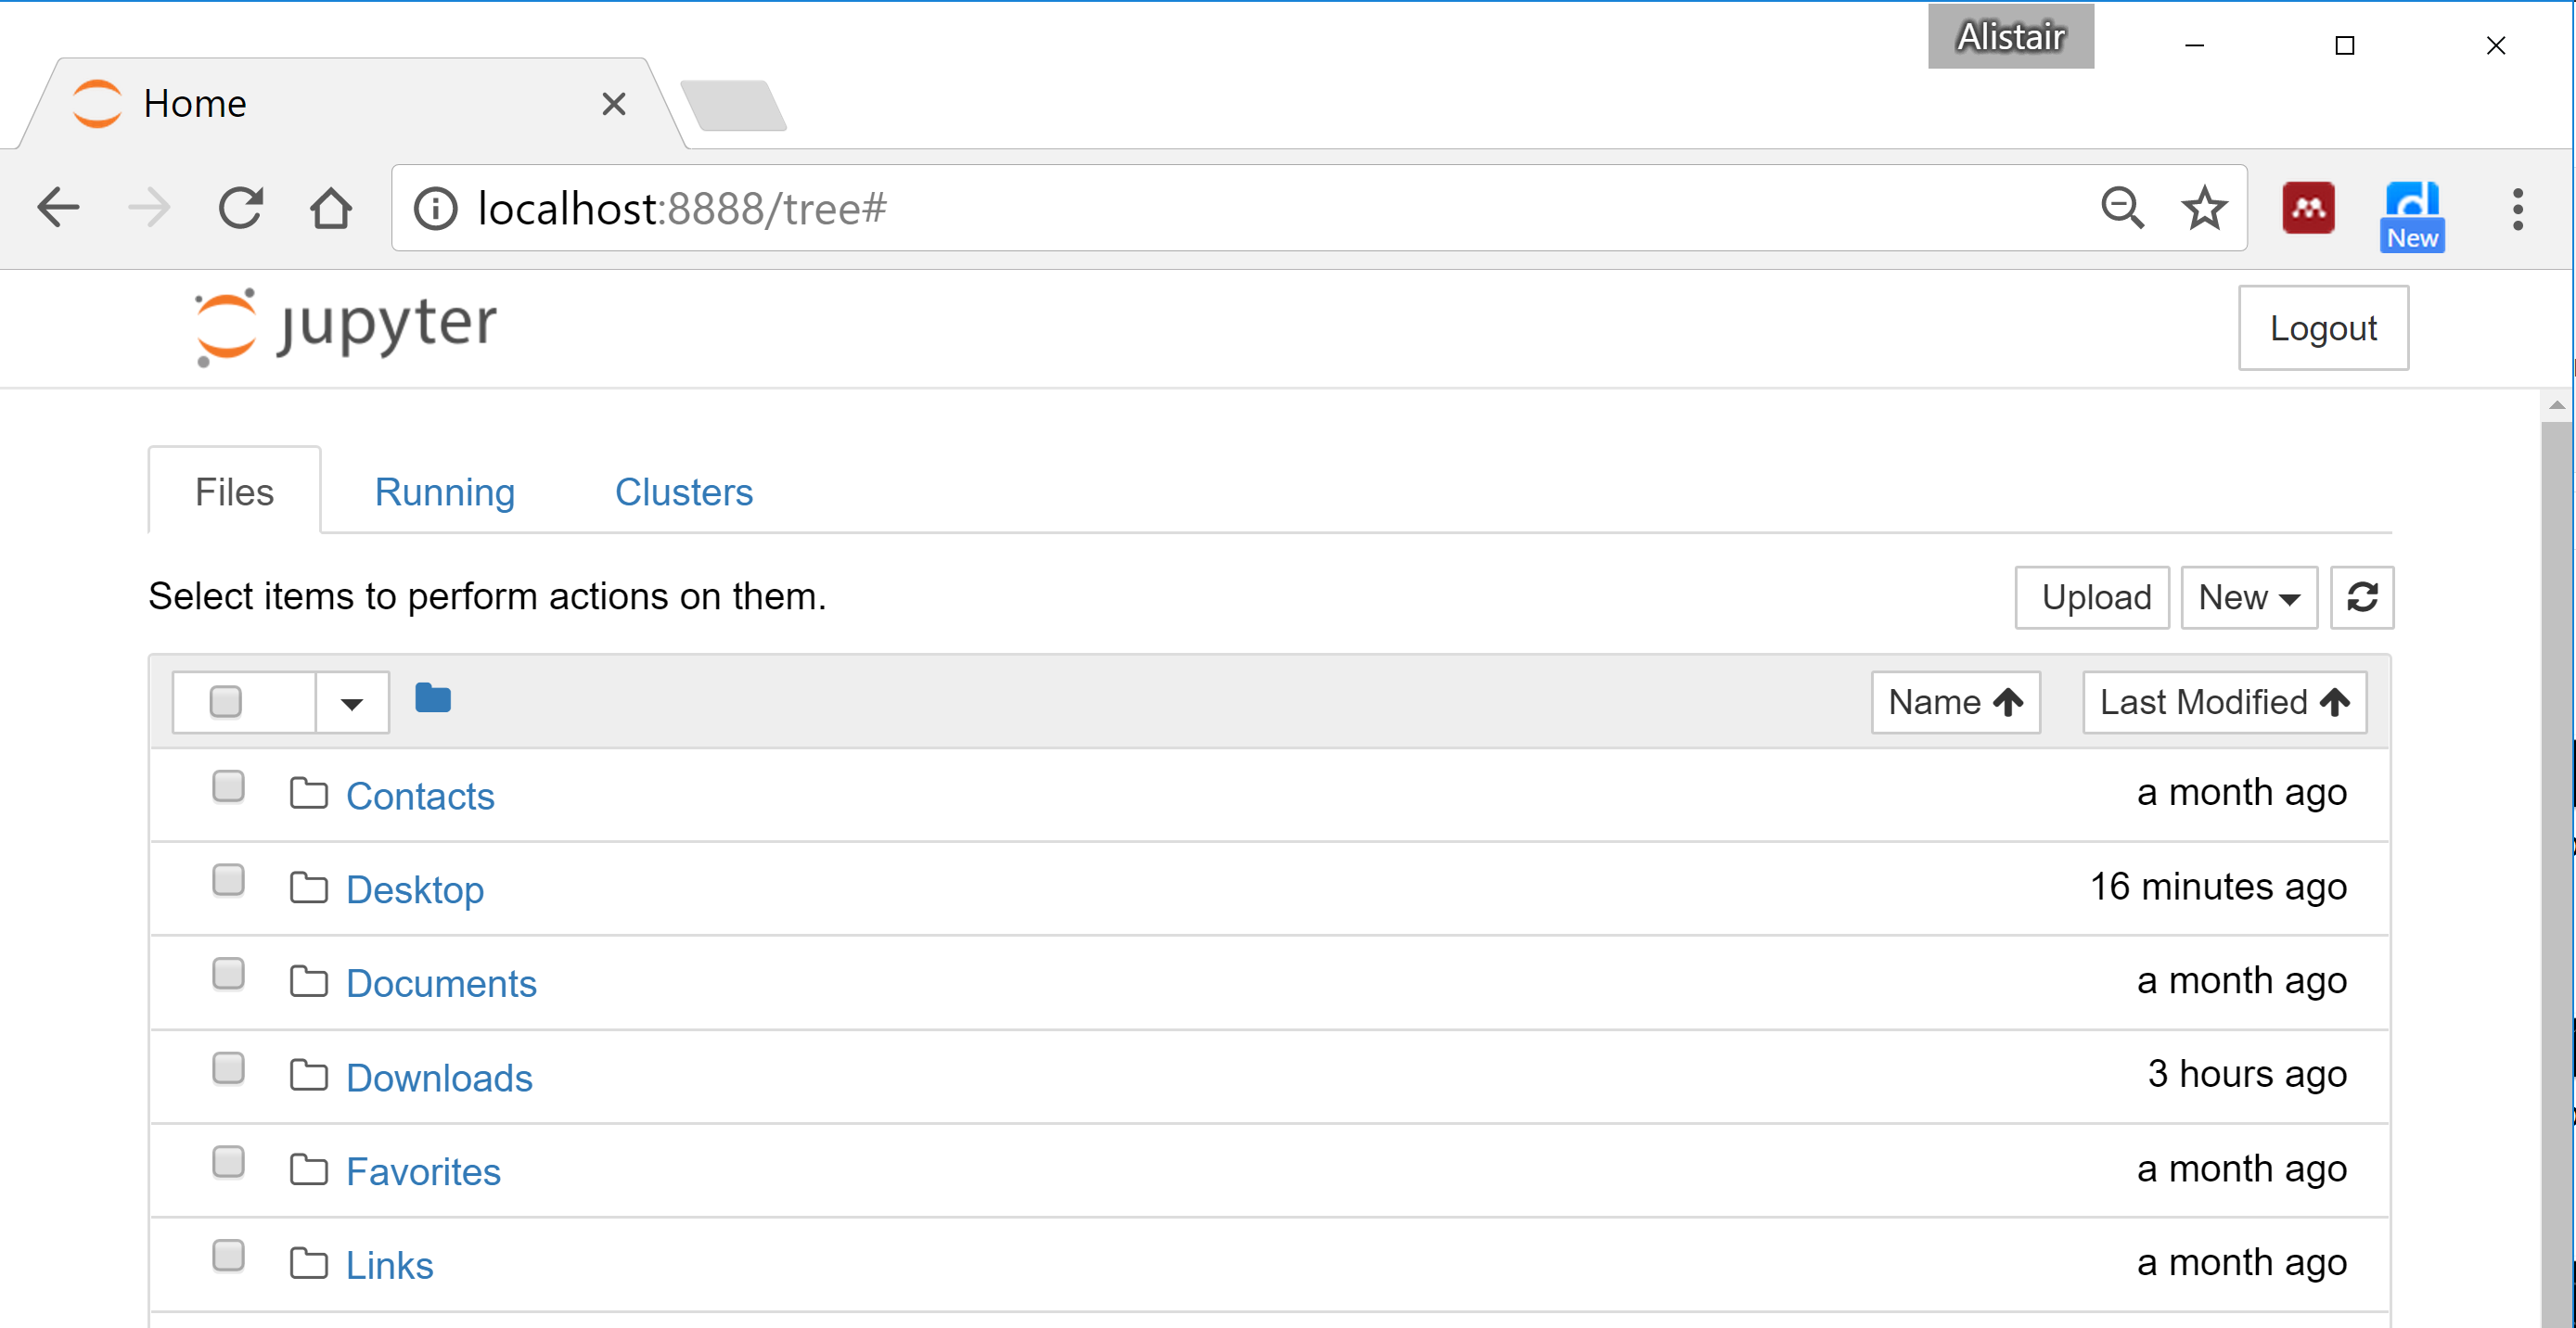
To start using Jupyter, run the command “jupyter notebook” from the command
prompt:

This should cause your Web browser to open automatically, and you will see a list of files and directories a bit like this:
To create a new notebook, click the “New” button, then select “Python 3”:

This should open up a new tab in your browser with the new notebook ready to use:
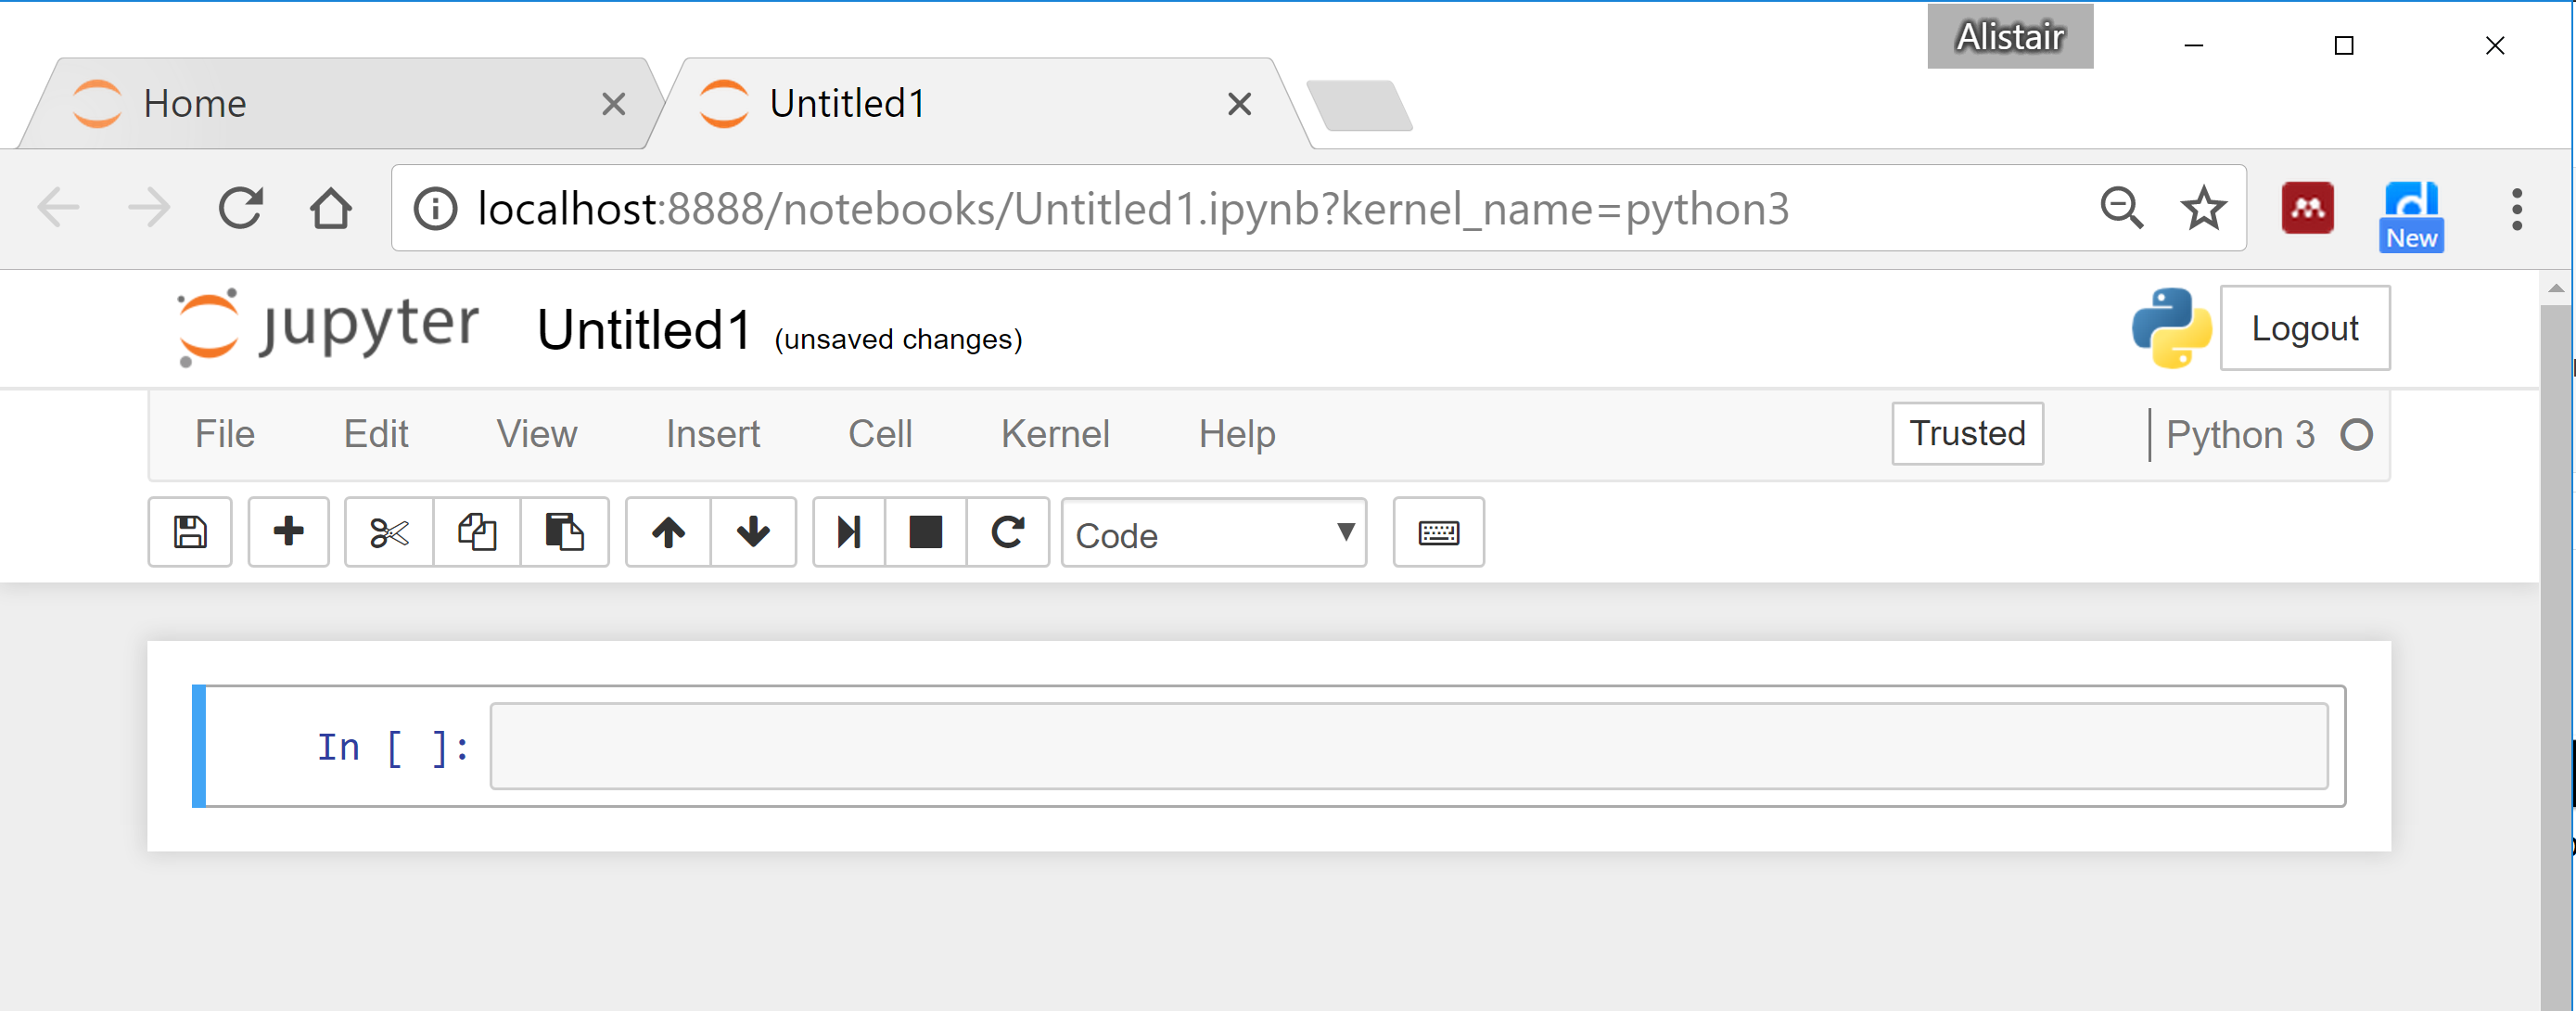
A notebook is made up of cells. Each cell contains Python code which you can execute.
For example, type “print('hello')” in the first cell, then press the play button
shown circled in red:

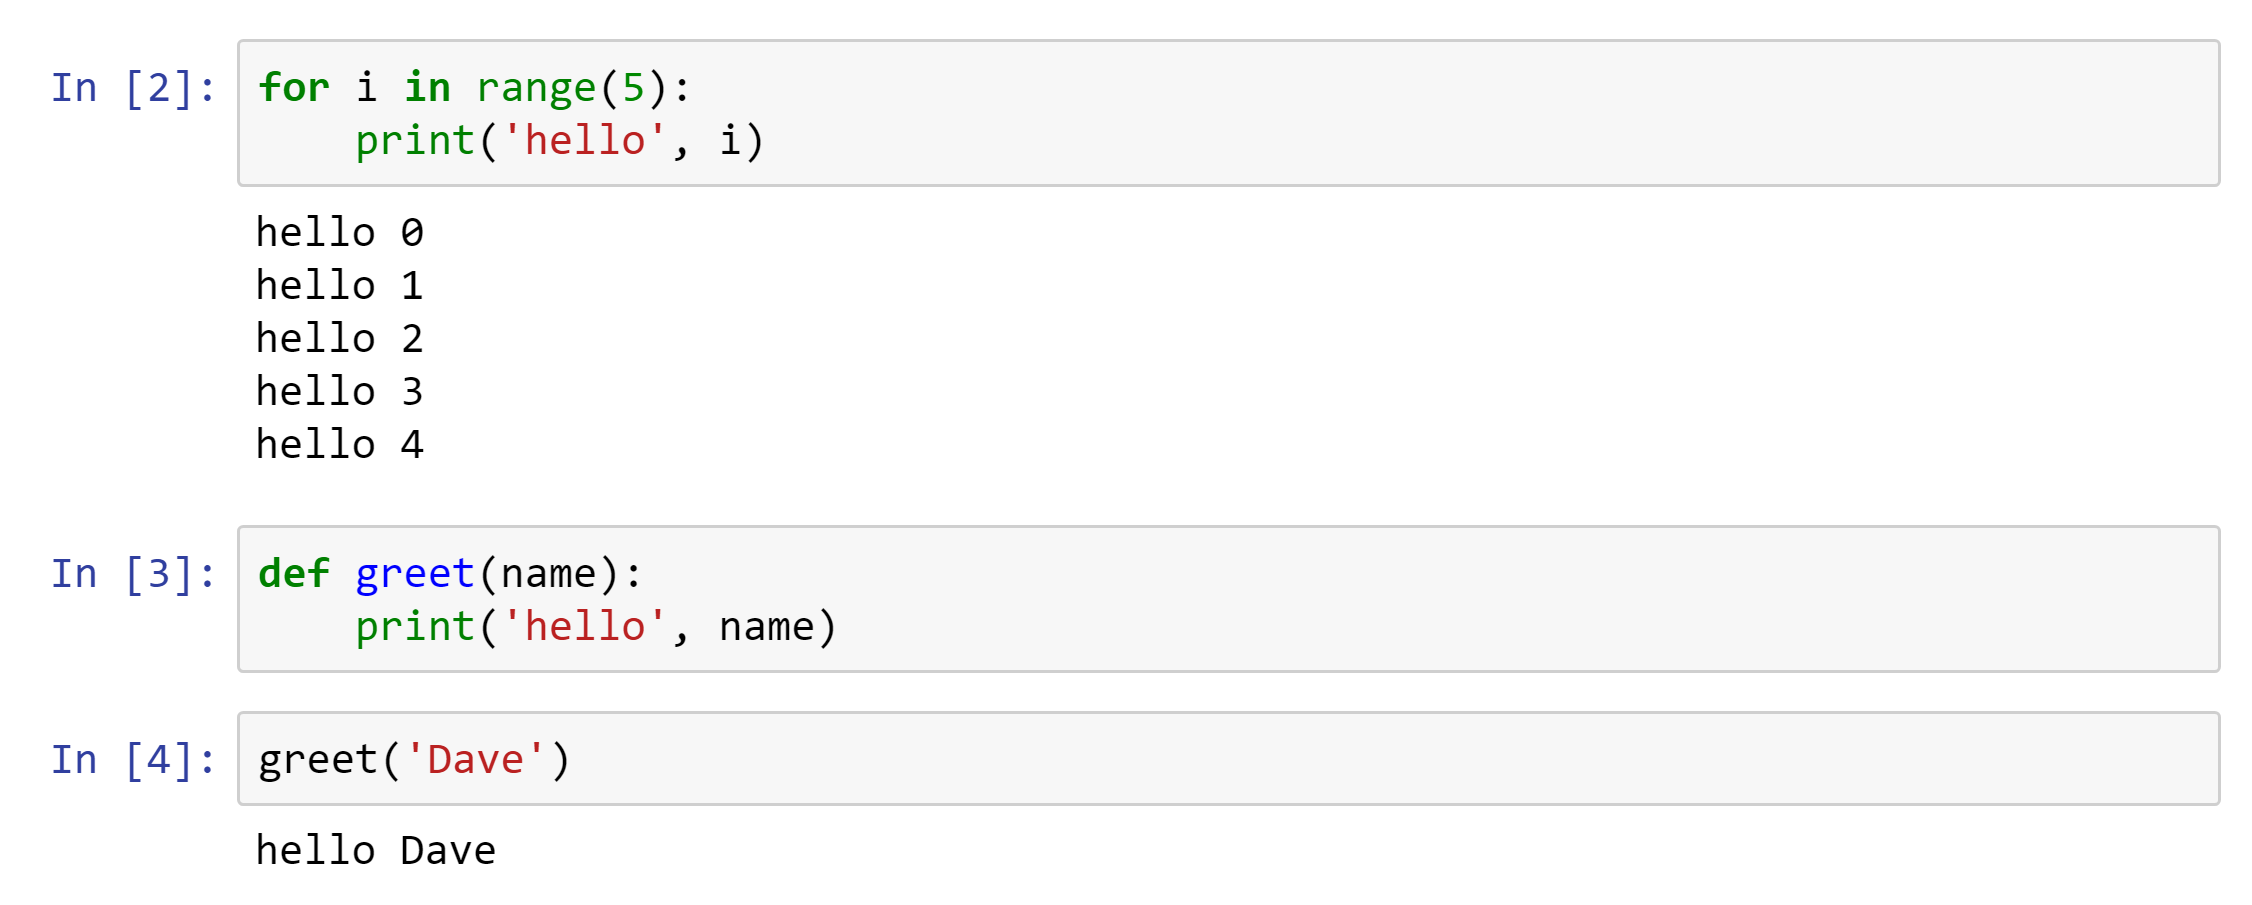
Here’s some more examples:
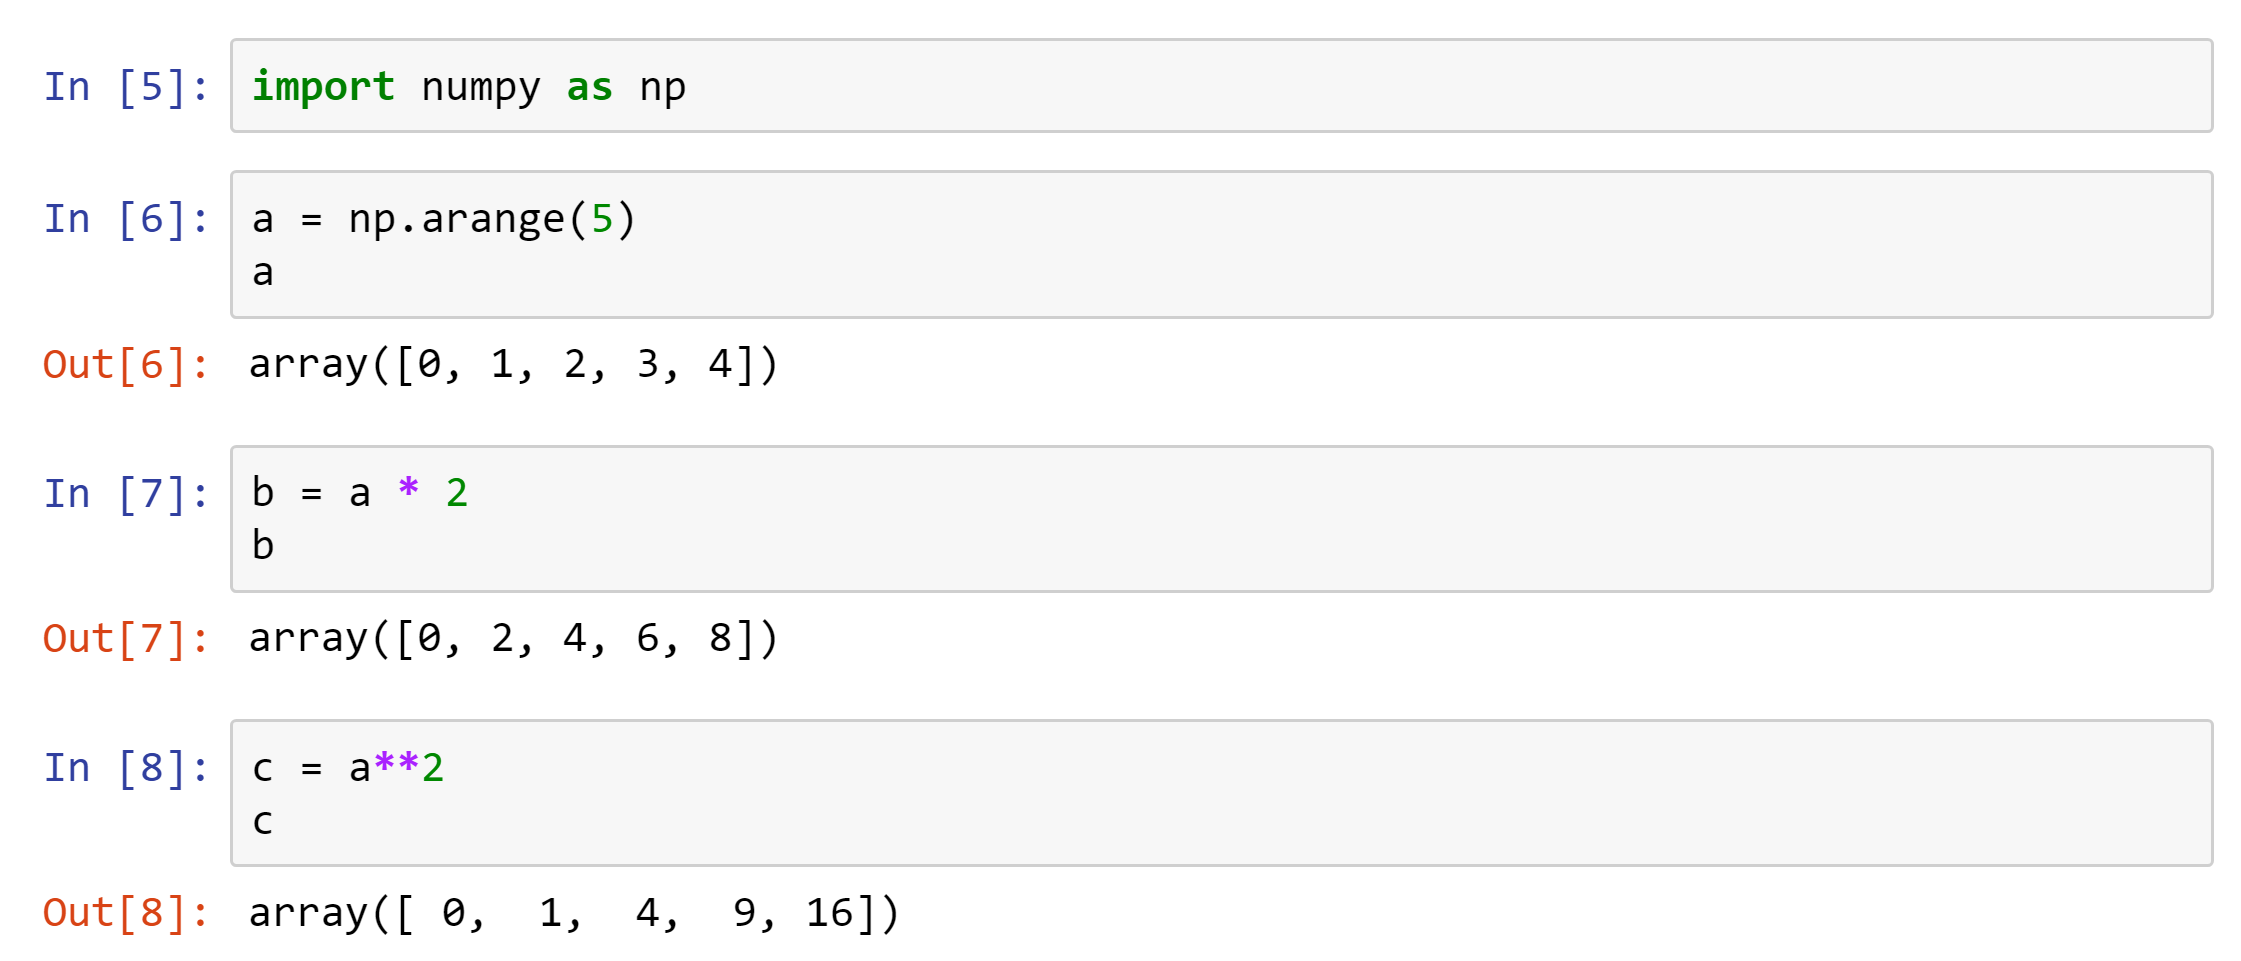
And here’s some examples using numpy:
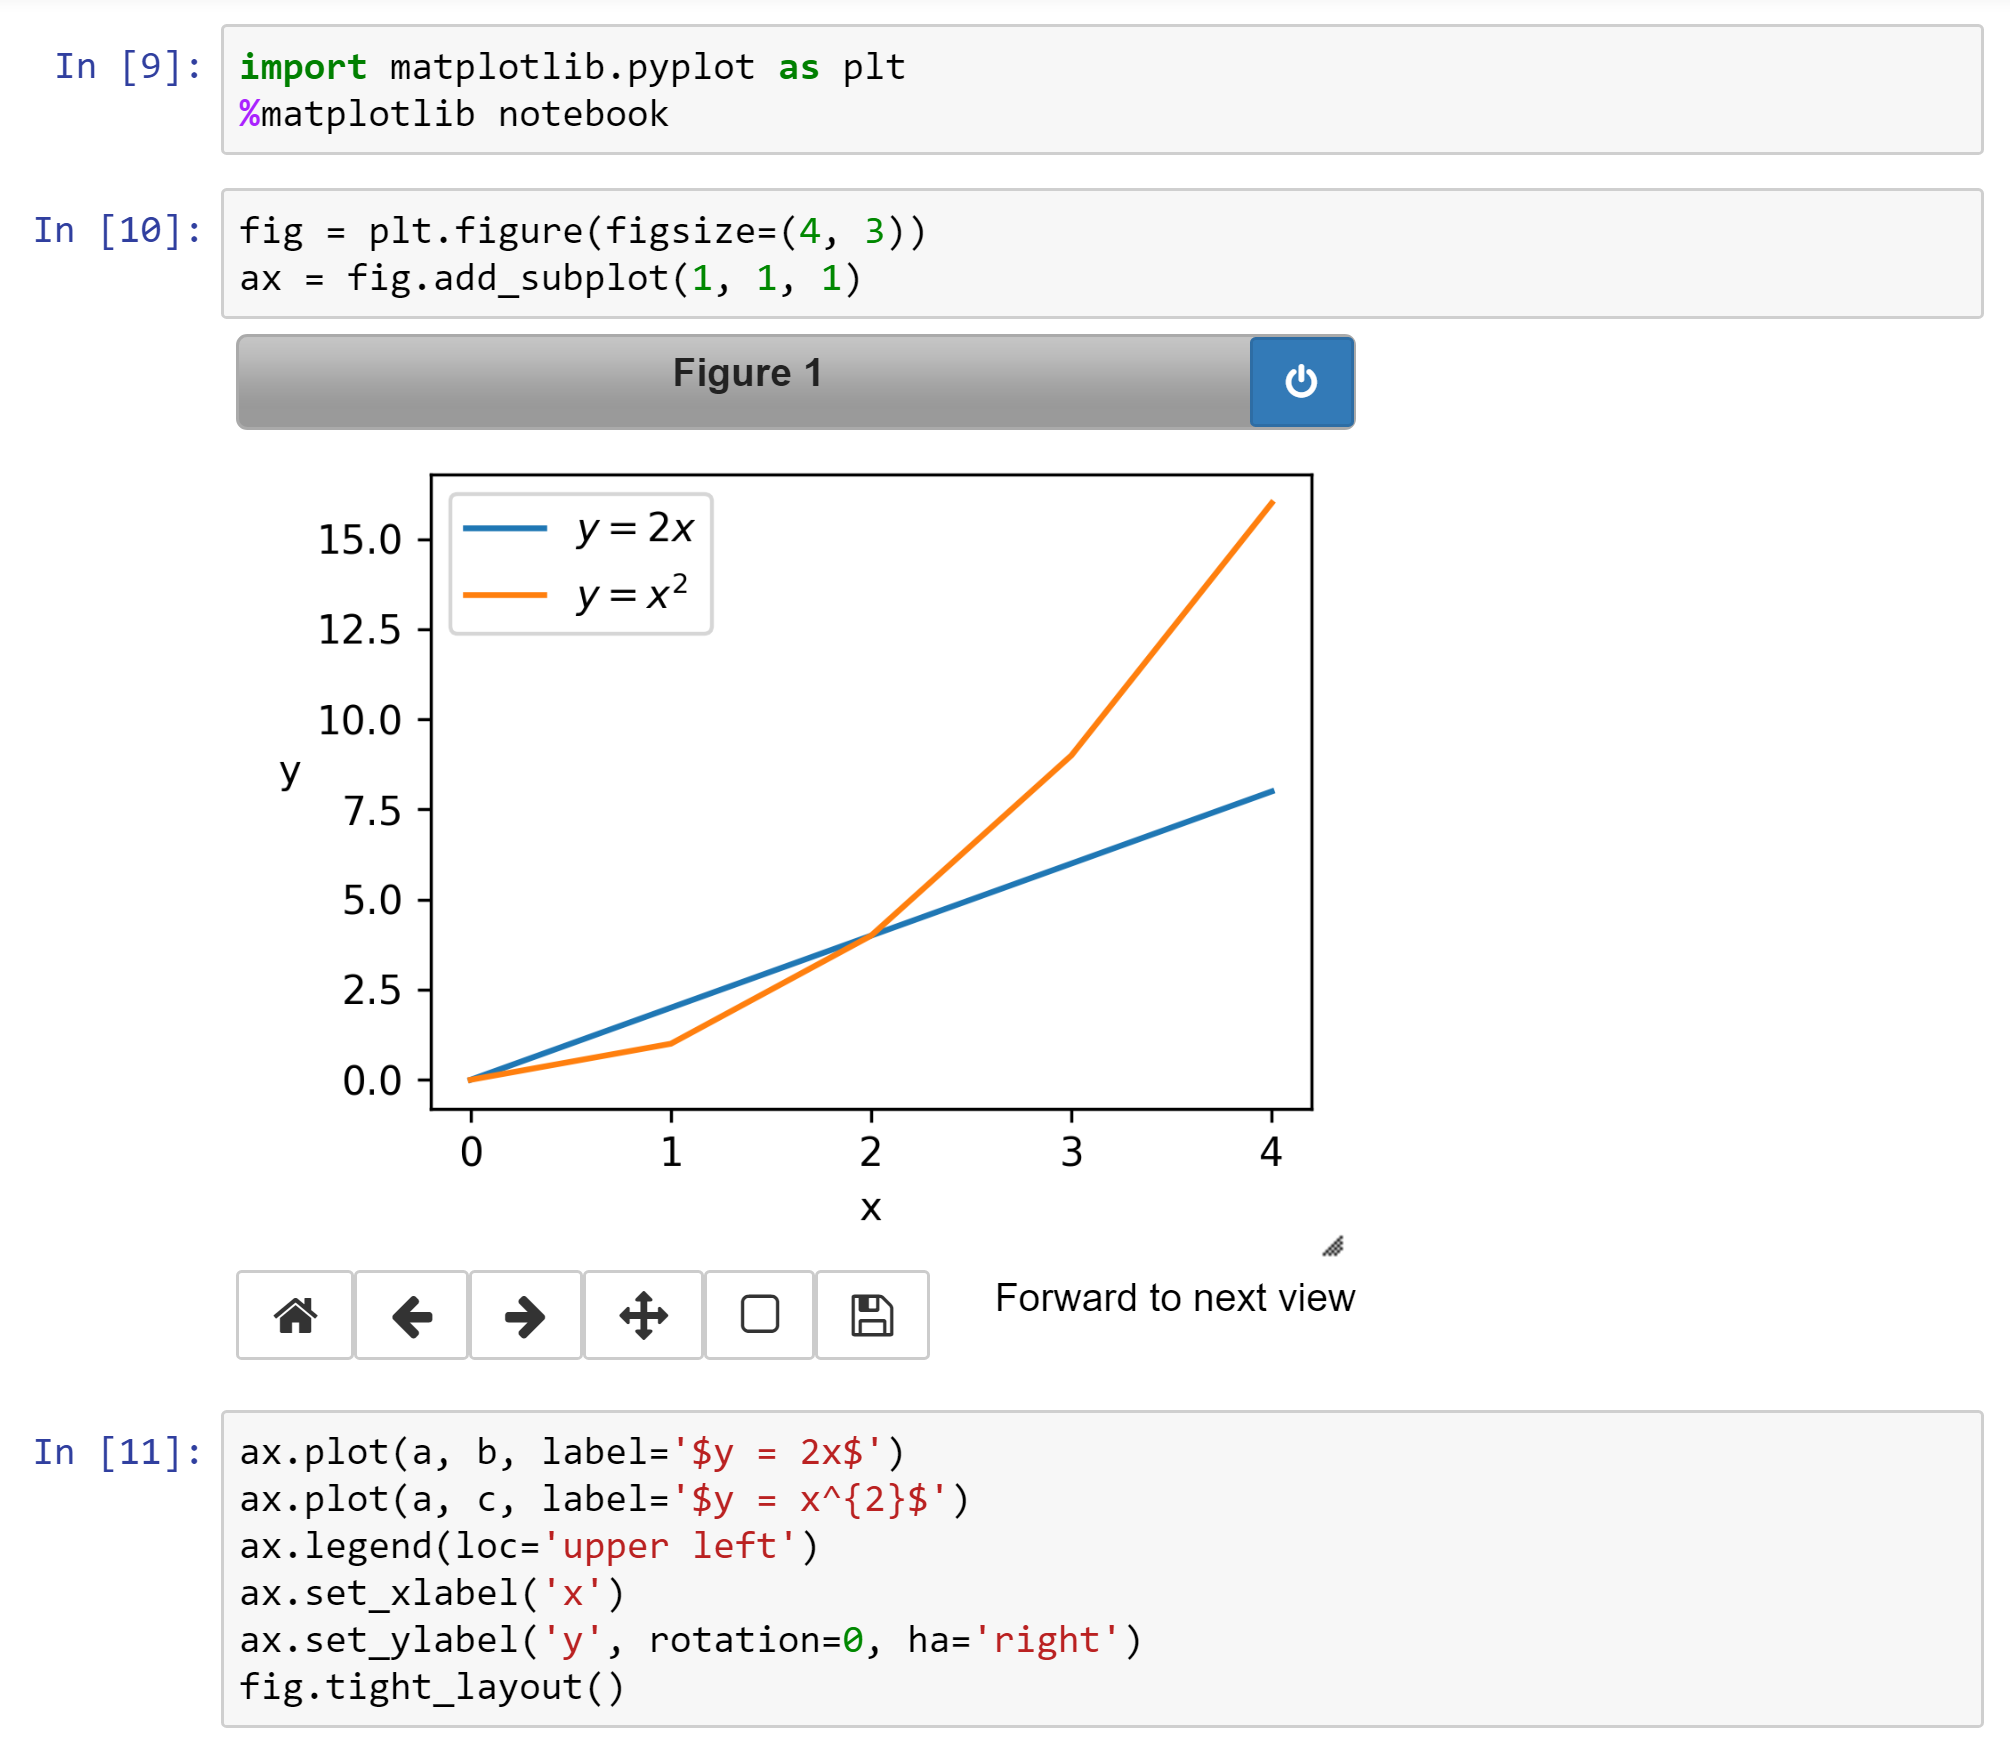
Finally, here’s an example of making a plot using a package called matplotlib:
Further reading
Hopefully this post has been enough to get you over some of the first few hurdles of installing Python and setting up your analysis environment. If there is anything you got stuck on or anything you think I should add, please feel free to add a comment below.
There are lots and lots of great resources on the Web with more information on Python in general and some of the packages I’ve mentioned. Here is a very small selection, please let me know if there’s anything I should add:
- Conda docs
- Conda tutorial by Corey Schafer
- Jupyter notebook docs
- Jupyter notebook tutorial by Corey Schafer
- NumPy docs
- NumPy tutorial by Roshan
- Matplotlib docs
- Matplotlib tutorial by Benjamin Root
- Pandas docs
- Various pandas tutorials
Post-script: getting help
There a couple of ways you can get access to helpful documentation while you are working interactively with Python.
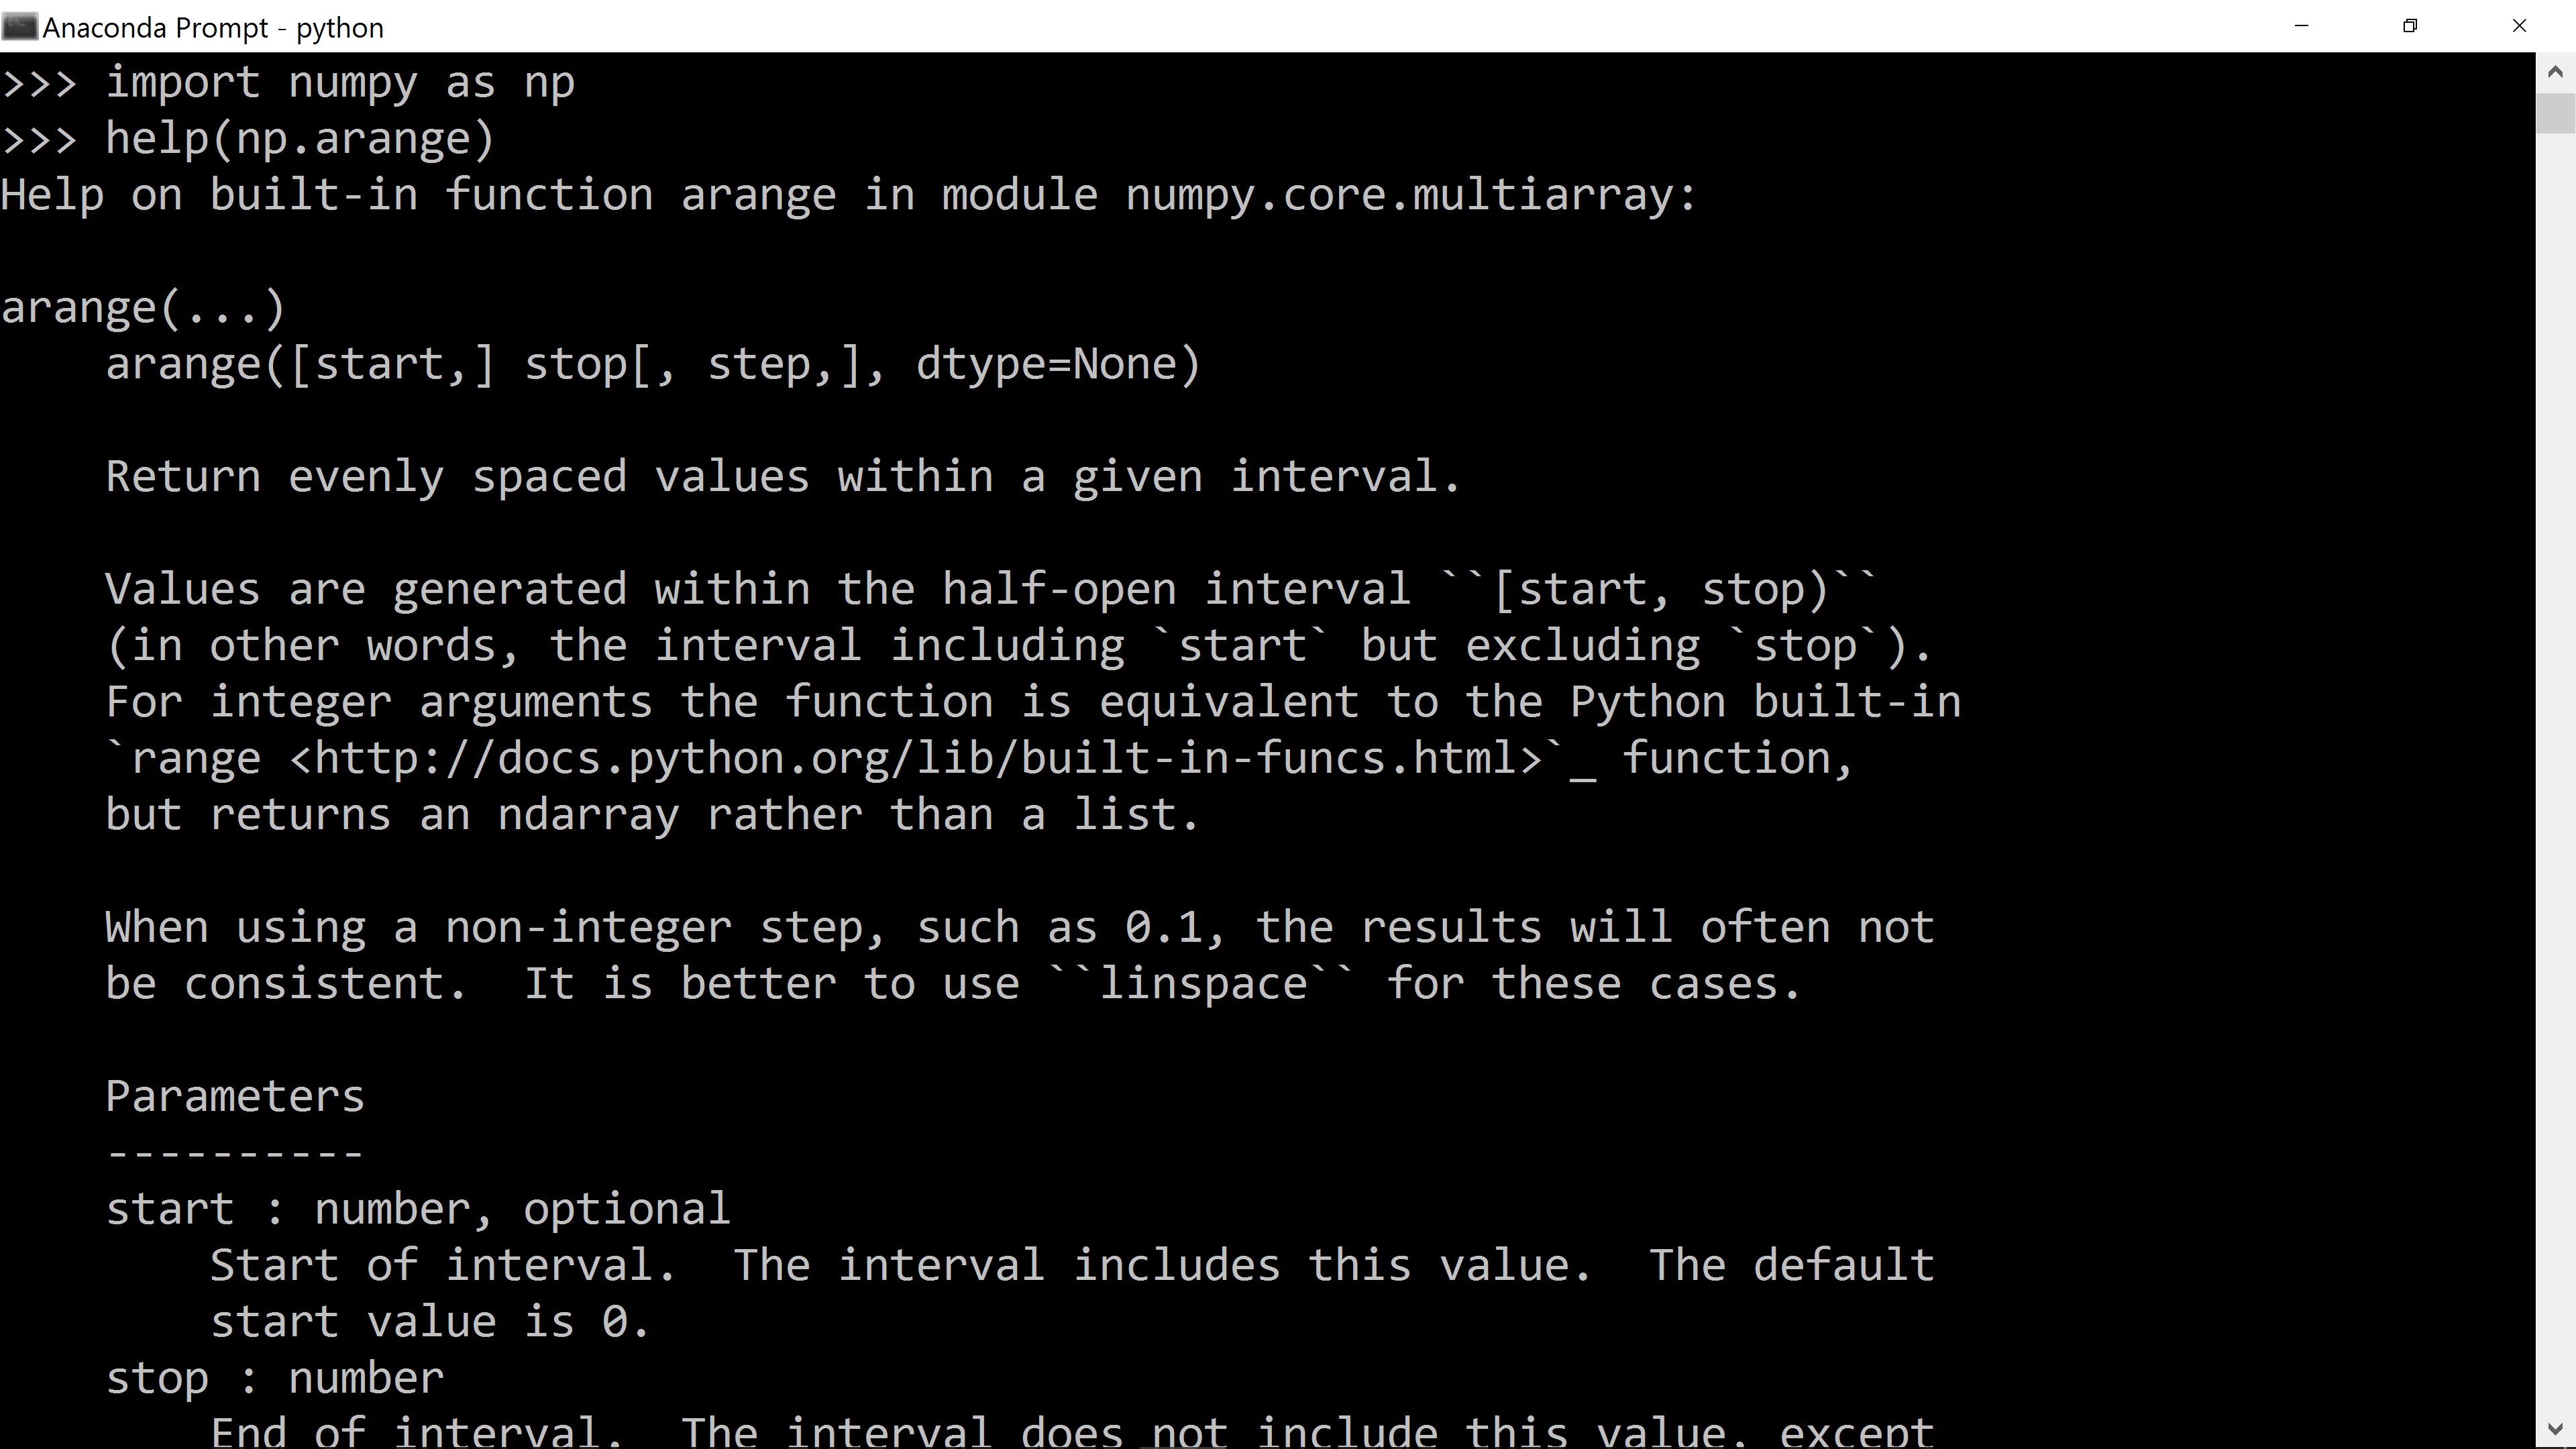
If you are using the Python interpreter in interactive mode, you can type the command “help(...)” at any time, replacing “…” with the name of a module,
function or method that you want to access documentation about. For example, here’s how to get documentation on the np.arange function:
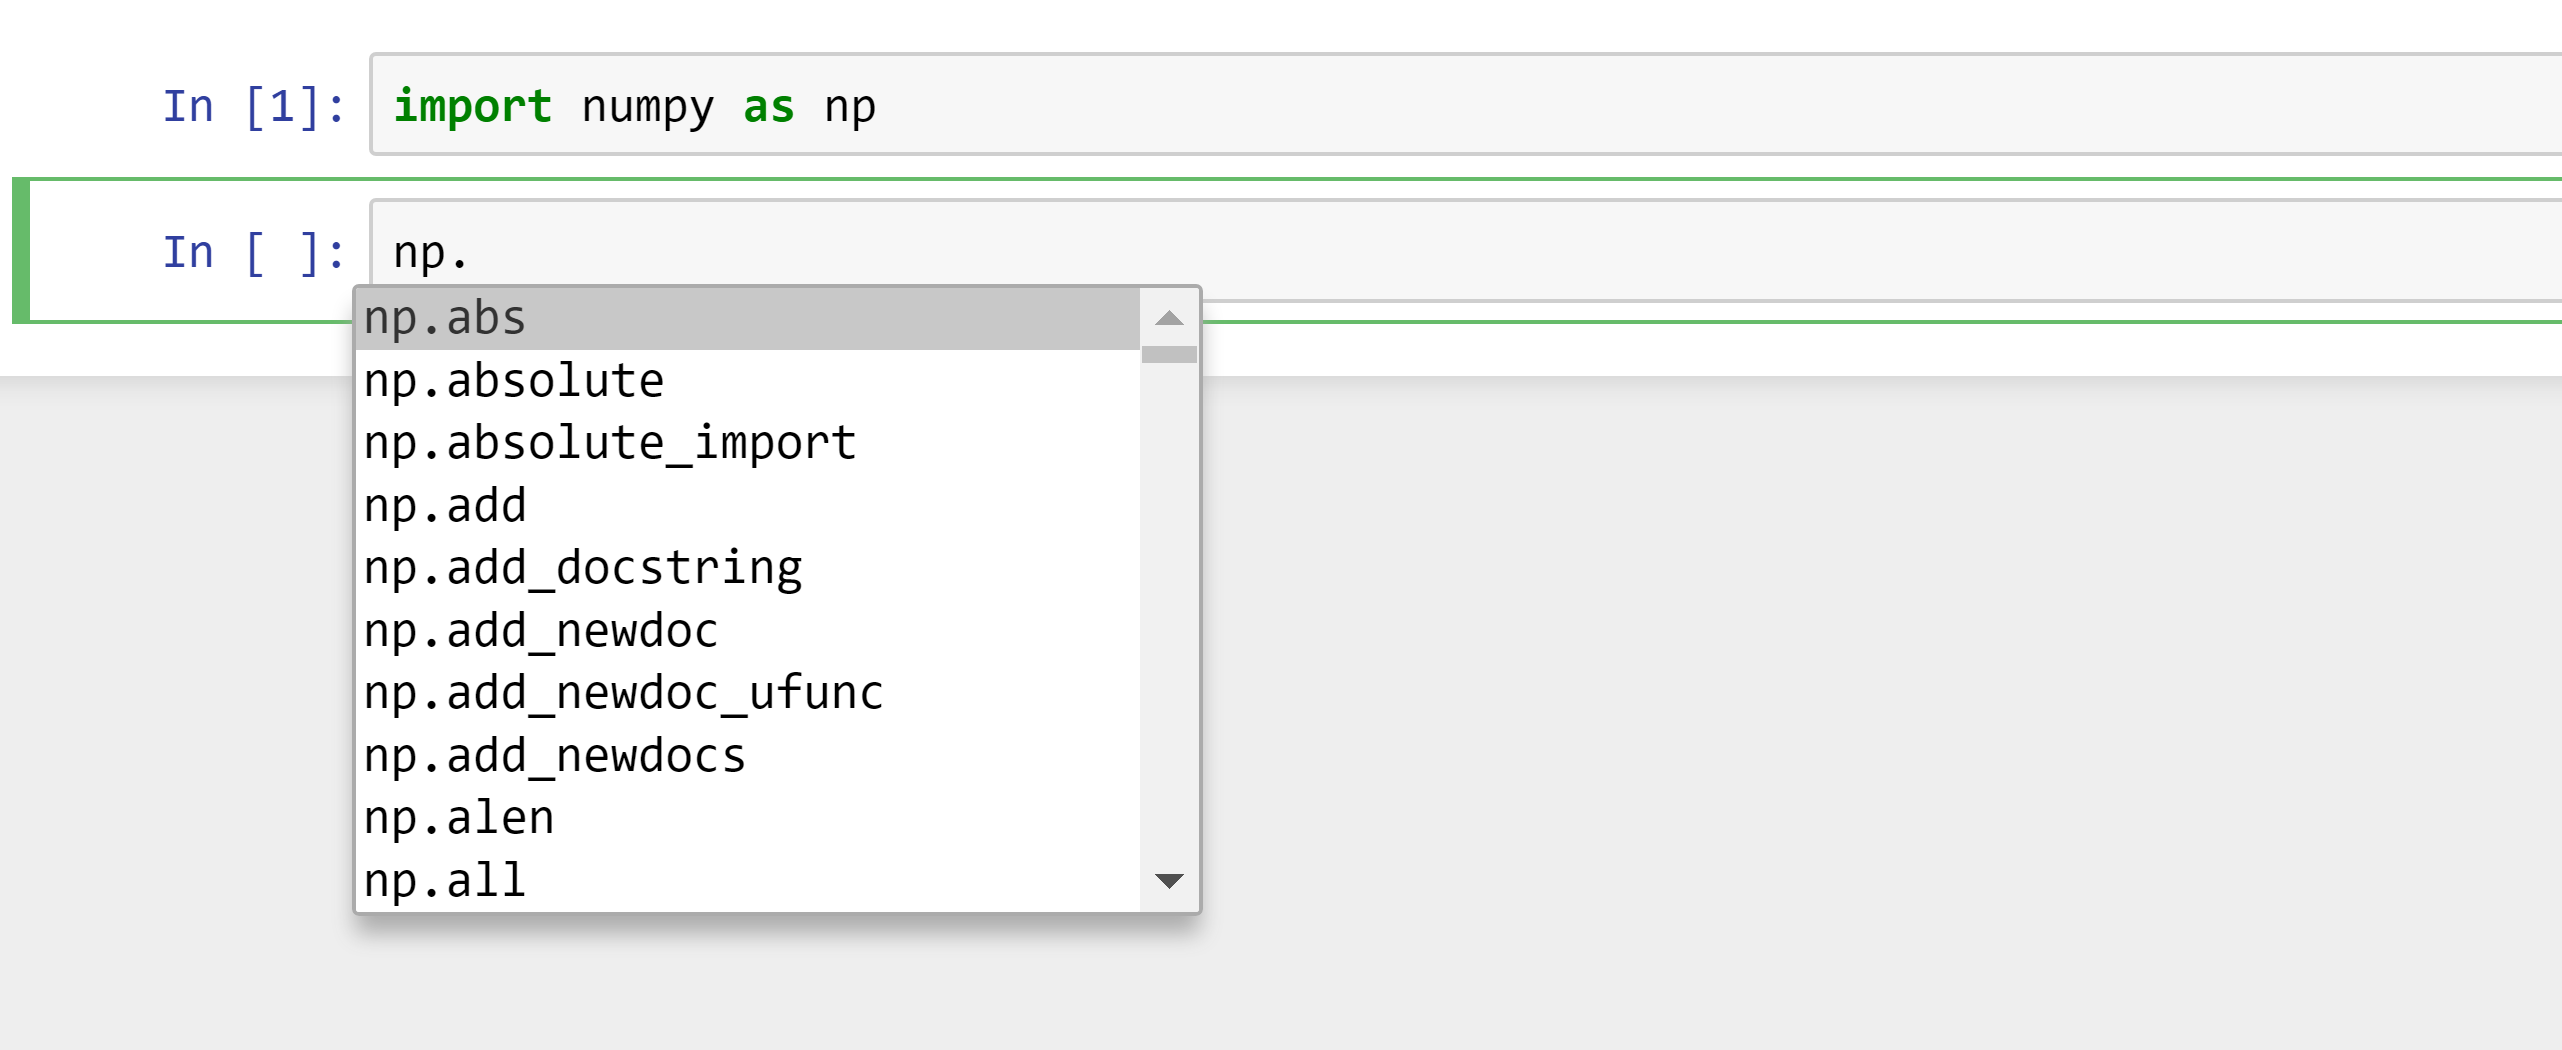
If you are working in a Jupyter notebook, here are three ways to get help. First, you can get a list of all available functions in a module (or methods on an object) by typing the name of the module (or object) followed by the dot (“.”) character, then press the “Tab” key on your keyboard:
You can get help on a function or method by typing the function name, then open brackets “(“, then hold down the “Shift” key and press the “Tab” key:
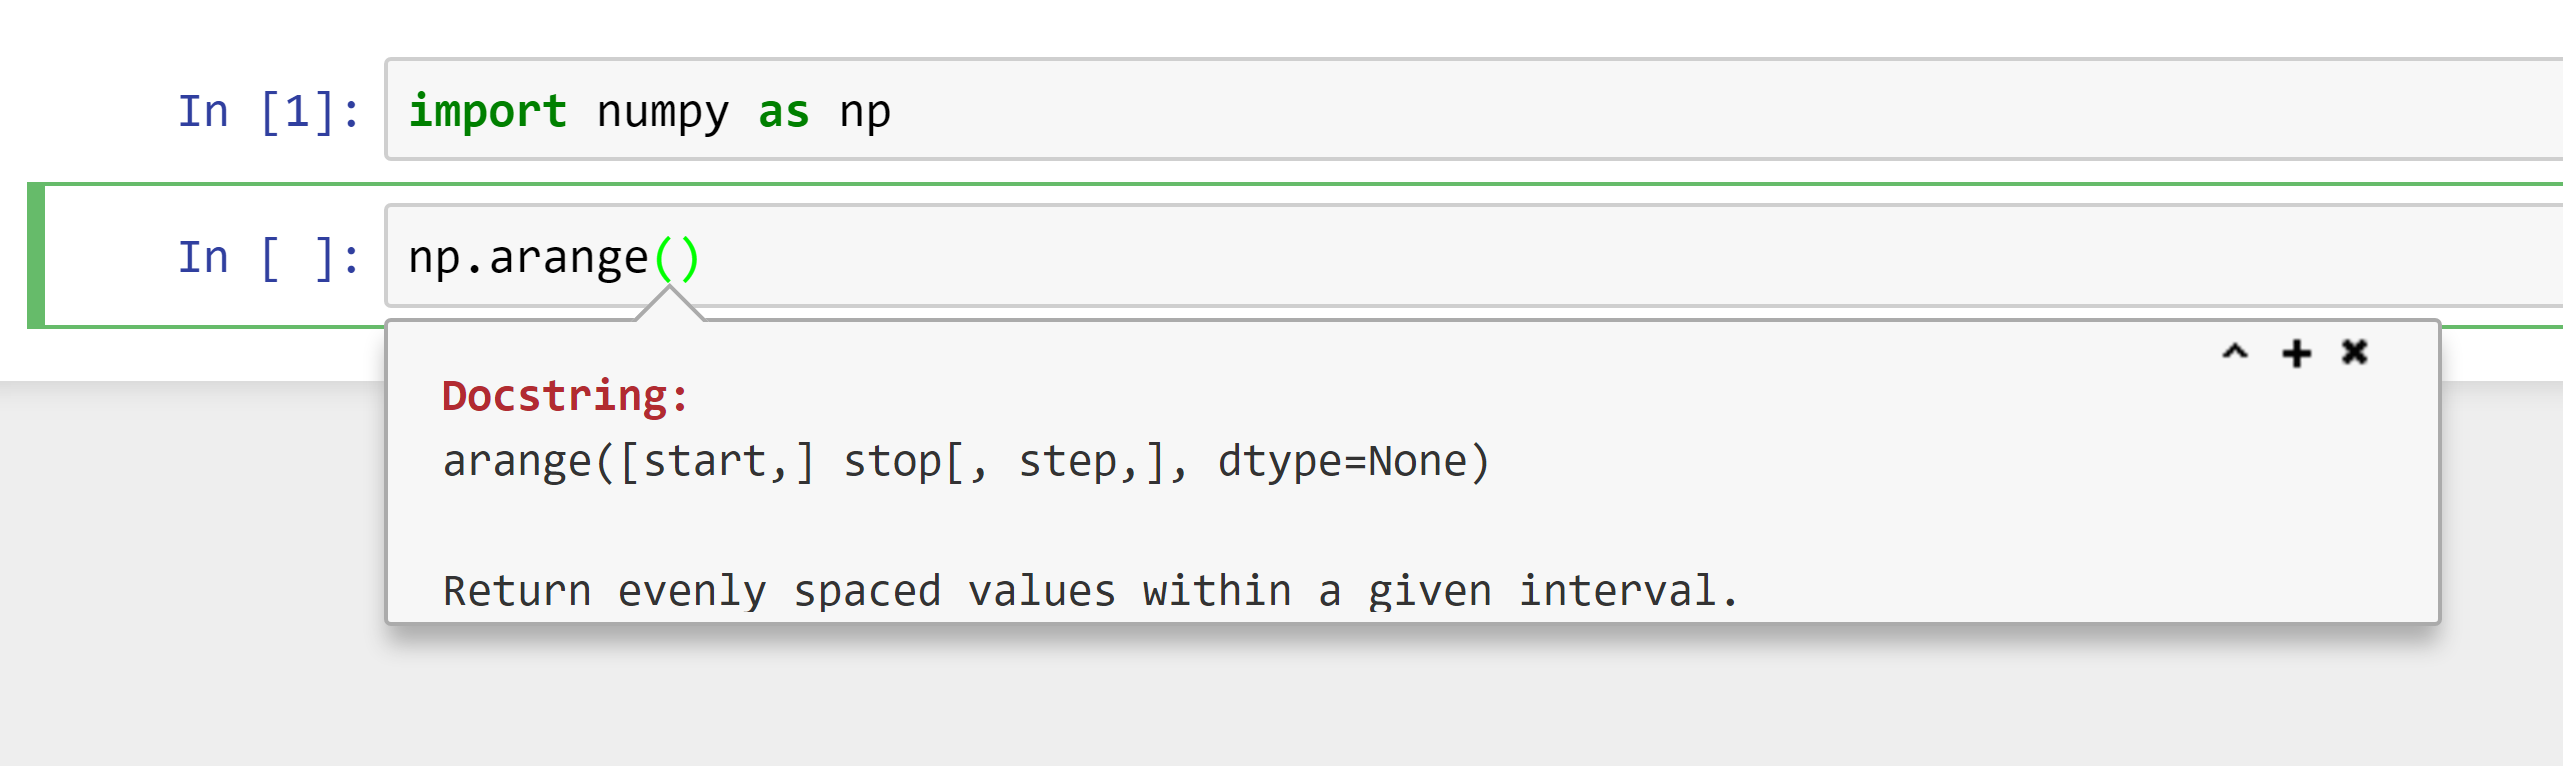
If you want to see more of the documentation, click on the “^” or “+” buttons.
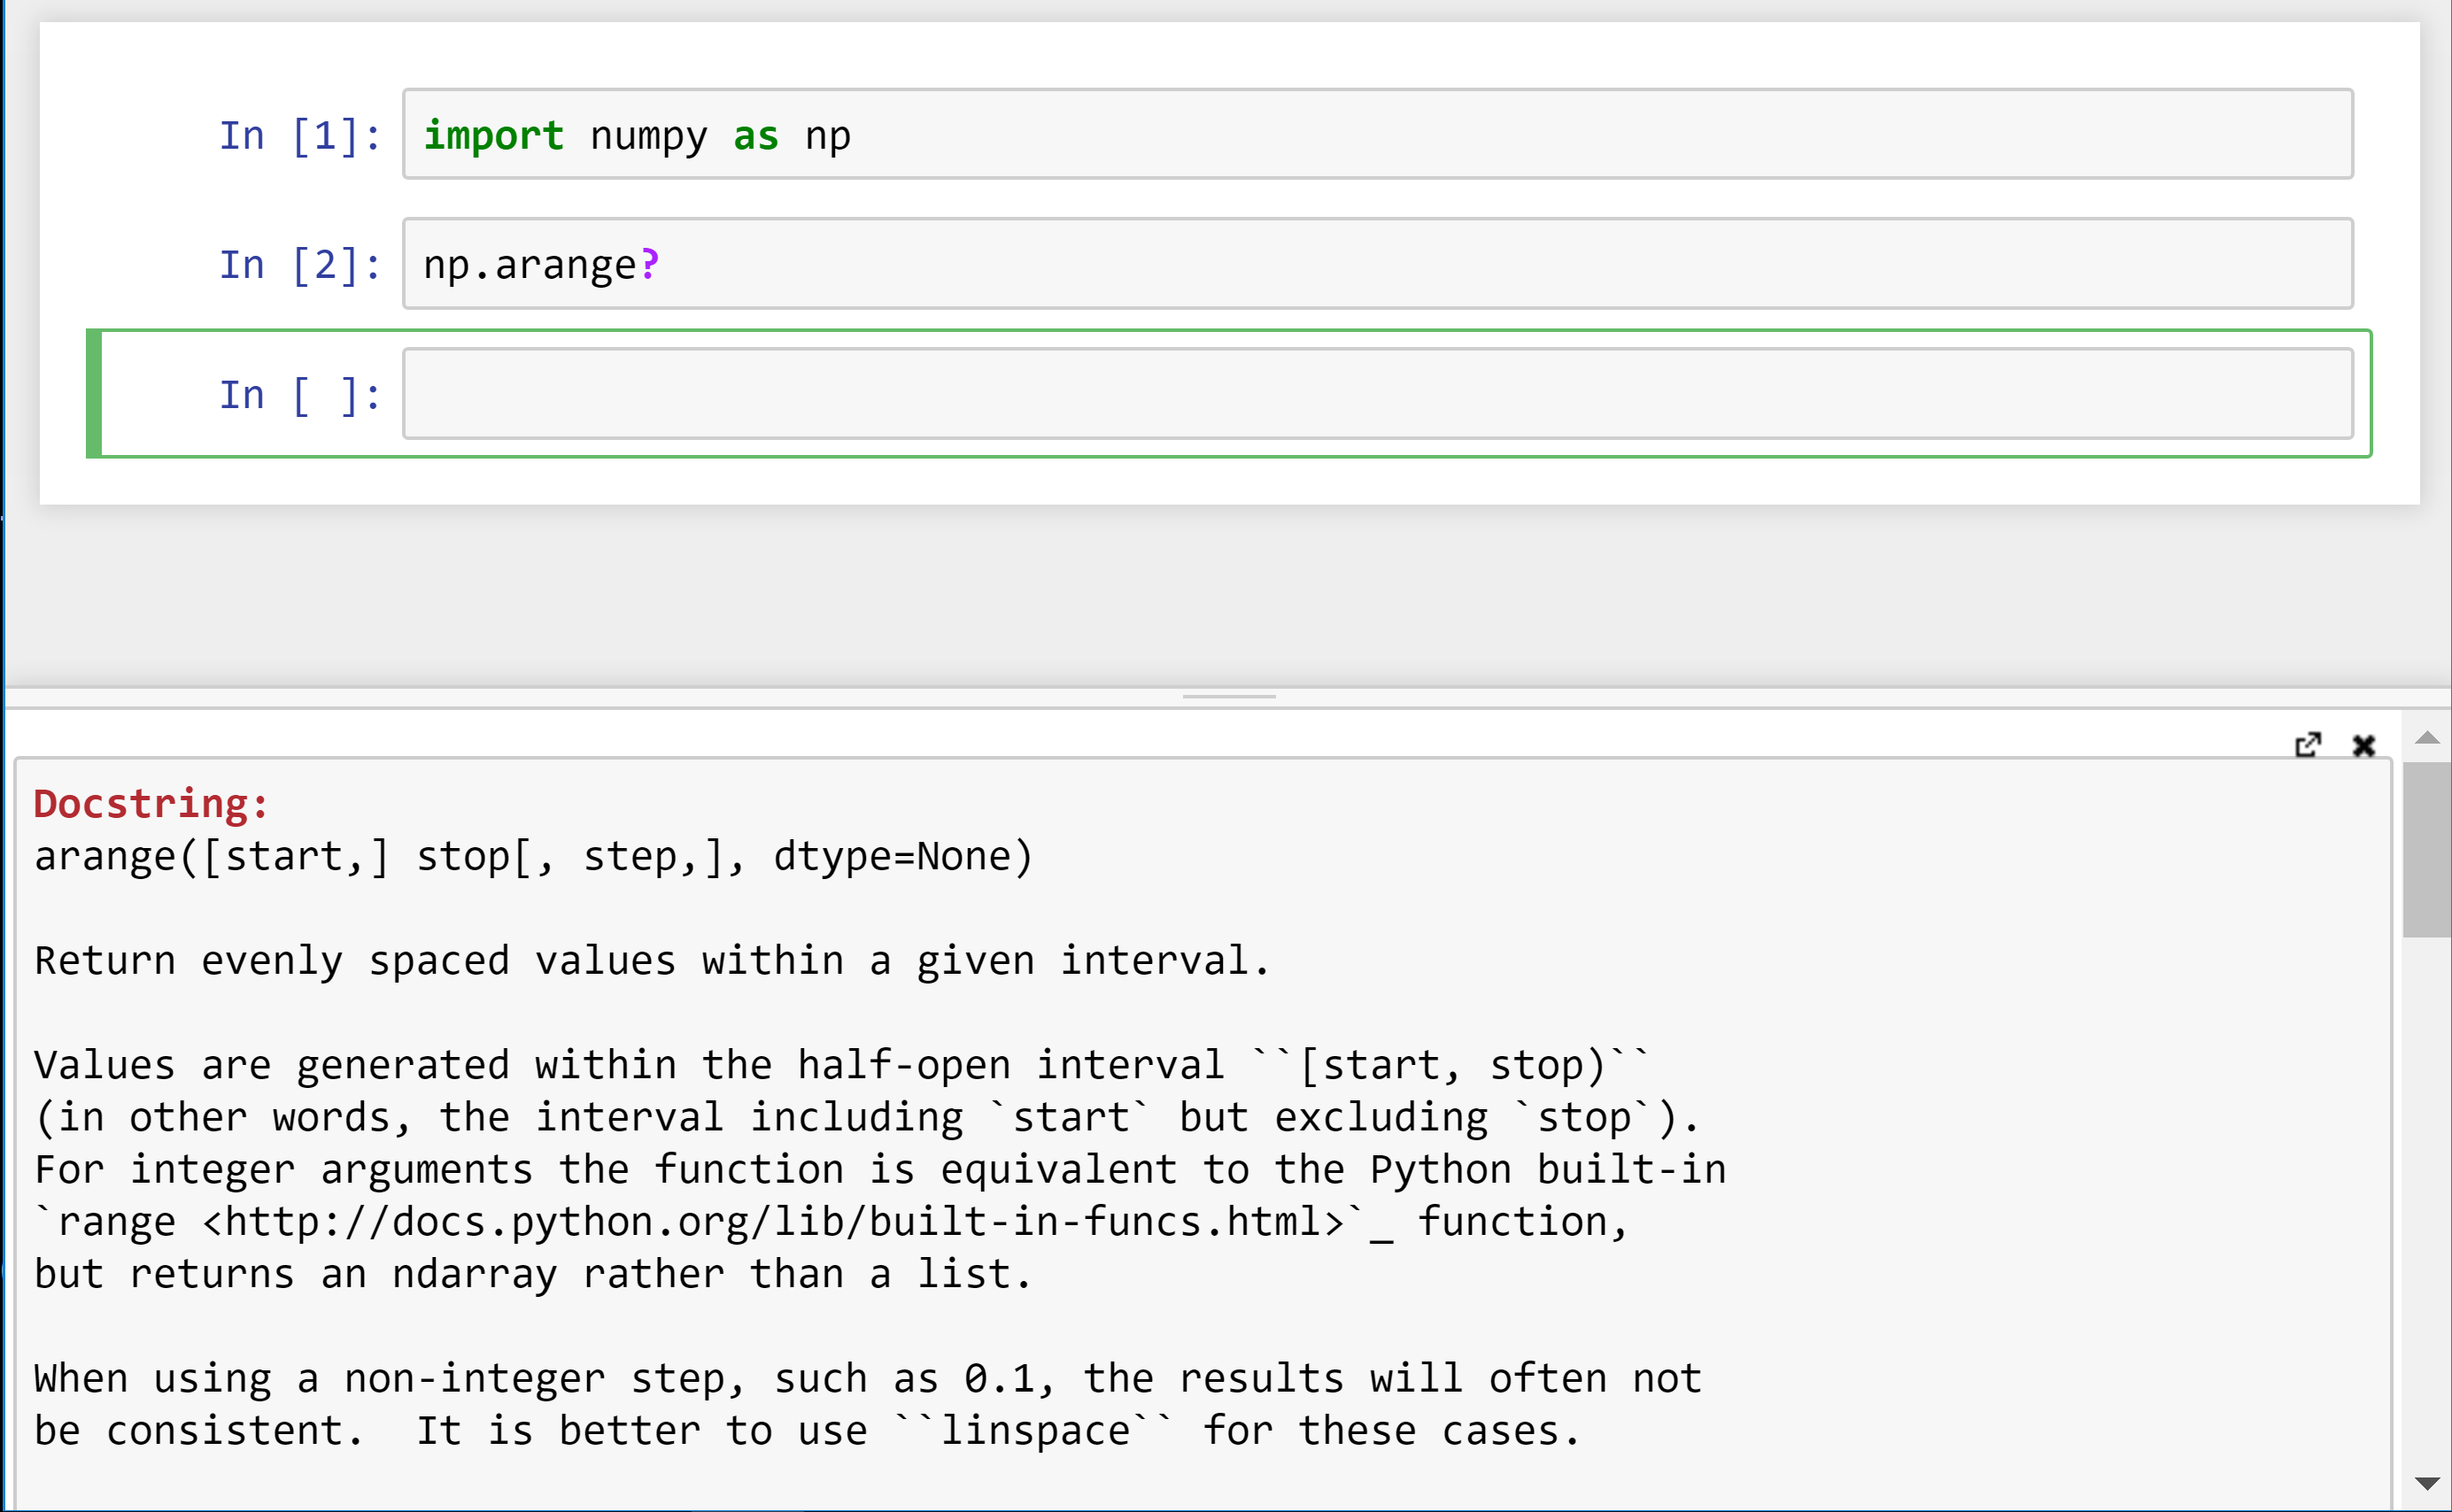
You can also just type the name of a function or method followed by a question mark “?” and execute the cell, which will bring up the full documentation at the bottom of the window:
Post-script: matplotlib backends
To use matplotlib within a jupyter notebook, you have to first execute a “magic”
command to tell matplotlib which backend to use. A “backend” is something behind the
scenes which handles drawing and displaying graphics. The magic command “%matplotlib
notebook” tells matplotlib to use the “notebook” backend. An alternative is the
“inline” backend.
If you are using matplotlib within a jupyter notebook, and you want to see plots
displayed inline within the notebook, then you can use either “%matplotlib inline”
or “%matplotlib notebook”, and you don’t need to ever call “plt.show()” (which
is a command you might see in some older matplotlib tutorials).
If you use “%matplotlib inline” then all of the code relating to a single
figure needs to be within a single code cell, whereas if you use “%matplotlib
notebook” then you can change or add to a figure from different code cells. Also
“%matplotlib notebook” allows you to zoom and pan a figure, so it’s generally
better for interactive work.
Post-script: installing packages with pip
If you are new to Python, the easiest way to install packages is via the “conda install” command. However, not all packages can be installed via conda. There is
an even larger repository of Python packages available from something called the Python Package Index, or PyPI for short. Packages
from PyPI can be installed via a different command called “pip”. For example, from the command prompt you can type “pip install [package]” replacing “[package]”
with the name of the package to install.
To find out if a package is available from conda, try the command “conda search [package]”. If the package you want is not available via conda, try “pip search
[package]” to see if it is available from PyPI.
The reason why conda is generally the preferred installation command is because some packages (e.g., that include C extensions) require special compilation if installed via pip, but packages from conda are pre-compiled binaries and so can be installed easily on multiple operating systems without having to first install a compiler.